Getting Started
Welcome to Porto Magento Theme!
We would like to thank you for purchasing Porto Magento Theme! We are very pleased you have chosen Porto Magento Theme(or interested in ) for your website, you will be never disappointed! Before you get started, please be sure to always check out this documentation. We outline all kinds of good information, and provide you with all the details you need to use Porto Magento Theme. Porto can only be used with Magento 1.x or 2.x and we assume that you already have Magento installed and ready to go.
If you are unable to find your answer here in our documentation, we encourage you to contact us through themeforest item support page with your site CPanel(or FTP) and magento admin details. We're very happy to help you and you will get reply from us more faster than you expected. Thank you, we hope you to enjoy using Porto Magento Theme!
Compatible with Magento:
Porto Magento Theme is fully compatible with Magento Community Edition 1.7.x, 1.8.x, 1.9.3.x, 1.9.4.x, 2.0.x, 2.1.x, 2.2.x, 2.3.x and Magento Enterprise Edition
Magento Information
To install this theme you must have a working version of Magento already installed. If you need help installing Magento, follow below sites and tutorials from magento.com, hope everything that you need are there.
- System Requirements - Required system credentials for your magento installation.
- Installation Guide - Installation guide that describes how to install magento.
- Online Magento 1.x guide - Online magento documentation that describes about magento in detail.
- Magento Forum - Magento forum site.
- stackoverflow.com - You can also get some useful articles from stackoverflow.
![]()
Installation & Update
Magento Installation
Please refer this Installation Guide.
Theme Installation
Prepare Installation
-
We recommend you to duplicate your live store on a development store and try installation on it in advance.
-
Backup magento files and the store database.
Important!
It's very important to backup all of themes and extensions in Magento before installation, especially when you are working on a live server. We strongly recommend you to do not omit this step.
-
Enable all caches in your magento.
Important!
It's very important to enable the caches, Because, sometimes, some of the extensions of the theme were installed incorrectly. So you should enable the caches during upload the theme files, then you should disable or clear the caches, when complete to upload the theme files.
Theme Installation
-
Theme Files Upload
- Upload via FTPLog into your hosting space via a FTP software. ie, FileZilla.
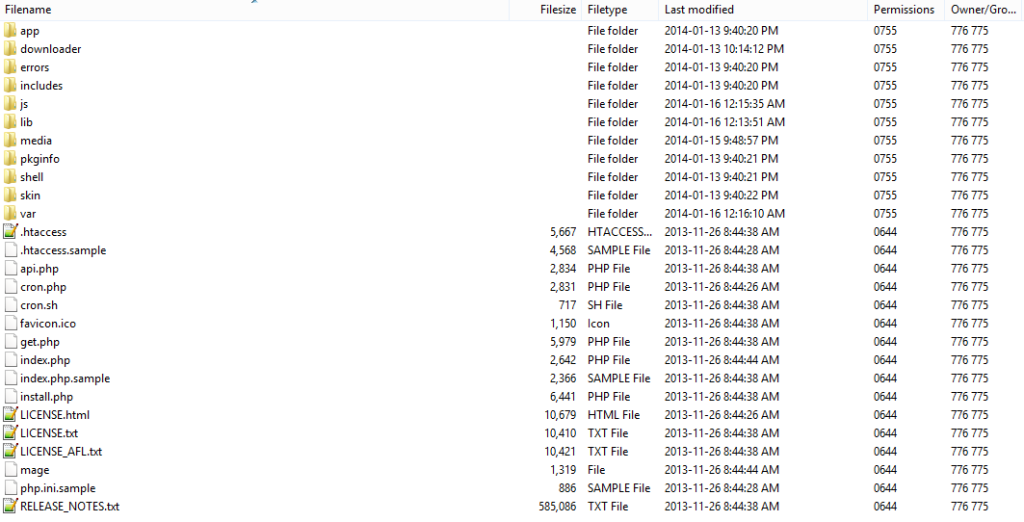
Unzip
Theme Package > Theme Files > Magento 1.x > Porto Theme.zipand upload all directories(There are 5 directories - app, js, lib, media and skin) to magento root directory.If you're not using configurable swatches, skip this step. If you're using Magento 1.9.1 above and you're going to use the configurable swatches, please do same step for
Theme Package > Theme Files > Magento 1.x > Patch for Configurable Swatches.zipfile. It includes 2 directories - app and skin, and it will overwrite preuploaded files.If you're using Magento 1.9.2 or above, please do same step for
Theme Package > Theme Files > Magento 1.x > Patch for Magento 1.9.2.x and above.zipfile. It includes 1 directory - app, and it will overwrite preuploaded files.If you're using Magento 1.9.2.2 or above, please do same step for
- Upload via CPanelTheme Package > Theme Files > Magento 1.x > Patch for Magento 1.9.2.2 and above.zipfile. It includes 1 directory - app, and it will overwrite preuploaded files.Log into your CPanel(Control Panel) by your hosting account or cpanel user information.
Upload
Theme Package > Theme Files > Magento 1.x > Porto Theme.zipto your magento root directory and unzip its content.If you're not using configurable swatches, skip this step. If you're using Magento 1.9.1 or above and you're going to use the configurable swatches, please do same step for
Theme Package > Theme Files > Magento 1.x > Patch for Configurable Swatches.zipfile. It may ask for overwritting files, please choose "Yes".If you're using Magento 1.9.2 or above, please do same step for
Theme Package > Theme Files > Magento 1.x > Patch for Magento 1.9.2.x and above.zipfile. It may ask for overwritting files, please choose "Yes".If you're using Magento 1.9.2.2 or above, please do same step for
Theme Package > Theme Files > Magento 1.x > Patch for Magento 1.9.2.2 and above.zipfile. It may ask for overwritting files, please choose "Yes". -
Disable compilation mode in
System > Tools > Compilation. -
Disable all cache related section that you have in your magento.
Important!
To apply the your changes working, you should disable or clear all of cache related sections, such as magento default cache, magento cache extension or CDN etc. The best choice is to disable all of them and enable it after you finish your work.
-
Log out from magento admin panel and log in again. Its essential to Logout/Login again to refresh your control panel.
Theme Activation
-
Get the purchase code
You can get the purchase code from https://themeforest.net/downlaods.

-
Input the purchase code in
System > Configuration > Porto > Activate Theme, then save the configuration.
Add block permissions for magento 1.9.2.2 and above
You should add block types for block permissions in System > Permissions > Blocks on magento 1.9.2.2.
filterproducts/featured_home_list
filterproducts/latest_home_list
filterproducts/newproduct_home_list
filterproducts/sale_home_list
filterproducts/mostviewed_home_list
filterproducts/bestsellers_home_list
blog/last
newsletter/subscribe
tag/popular
zeon_manufacturer/home

Demo Installation
Recently, Porto updated the new design version of some demos so you now can import both new and old demos.
Porto provides extremely easy - one click demo installation. In order to do demo installation, you should import static Blocks and CMS pages in Theme Settings > Theme Installation.
You may experience 404 Error when you try to open Theme Settings Panel. In this case, please log out and log in again to make the page working.
-
Click two
Importbuttons to prepare demo installation.
-
Click
Demo Xbutton to install demo version that you prefer to install.
Theme Customization
Make the Child Theme and Customize the Theme
-
We recommend you to create the child theme, if you need to customize the theme.
-
Make the child theme in the same directory with "porto".
Example
/app/design/frontend/smartwave/porto_child
/skin/frontend/smartwave/porto_child

-
Input "porto_child" into
System > Configuration > General > Design > Themes > Templates, Skin(Images/CSS), Layout.
-
Add the only changed files, not all files into the child theme's directories.
Example
Create custom.css file into
/skin/frontend/smartwave/porto_child/css/directory, then add custom css styles into that file. -
We provide the theme customiztion service with additional cost, please contact us in Item Support Page.
Theme Version Update
Prepare Update
Important!
Since we did significant structural changes in 3.0 including Bootstrap version upgrade, you may experience some problems after theme upgrade. You need to update your prior customization according to Porto's new structure.
It's very important to backup all of themes and extensions in Magento before installation, especially when you are working on a live server. We strongly recommend you to do not omit this step.
-
We recommend you to duplicate your live store on a development store and try installation on it in advance.
-
Backup magento files and the store database.
-
Disable all cache related section that you have in your magento.
Theme Installation
-
Theme Files Upload
- Upload via FTPLog into your hosting space via a FTP software. ie, FileZilla.
Unzip
Theme Package > Theme Files > Magento 1.x > Porto Theme.zipand upload all directories(There are 5 directories - app, js, lib, media and skin) to magento root directory.If you're not using configurable swatches, skip this step. If you're using Magento 1.9.1 above and you're going to use the configurable swatches, please do same step for
Theme Package > Theme Files > Magento 1.x > Patch for Configurable Swatches.zipfile. It includes 2 directories - app and skin, and it will overwrite preuploaded files.If you're using Magento 1.9.2 or above, please do same step for
Theme Package > Theme Files > Magento 1.x > Patch for Magento 1.9.2.x and above.zipfile. It includes 1 directory - app, and it will overwrite preuploaded files.If you're using Magento 1.9.2.2 or above, please do same step for
- Upload via CPanelTheme Package > Theme Files > Magento 1.x > Patch for Magento 1.9.2.2 and above.zipfile. It includes 1 directory - app, and it will overwrite preuploaded files.Log into your CPanel(Control Panel) by your hosting account or cpanel user information.
Upload
Theme Package > Theme Files > Magento 1.x > Porto Theme.zipto your magento root directory and unzip its content.If you're not using configurable swatches, skip this step. If you're using Magento 1.9.1 or above and you're going to use the configurable swatches, please do same step for
Theme Package > Theme Files > Magento 1.x > Patch for Configurable Swatches.zipfile. It may ask for overwritting files, please choose "Yes".If you're using Magento 1.9.2 or above, please do same step for
Theme Package > Theme Files > Magento 1.x > Patch for Magento 1.9.2.x and above.zipfile. It may ask for overwritting files, please choose "Yes".If you're using Magento 1.9.2.2 or above, please do same step for
Theme Package > Theme Files > Magento 1.x > Patch for Magento 1.9.2.2 and above.zipfile. It may ask for overwritting files, please choose "Yes". -
Disable compilation mode in
System > Tools > Compilation. -
Disable all cache related section that you have in your magento.
Important!
To apply the your changes working, you should disable or clear all of cache related sections, such as magento default cache, magento cache extension or CDN etc. The best choice is to disable all of them and enable it after you finish your work.
-
Log out from magento admin panel and log in again. Its essential to Logout/Login again to refresh your control panel.
Demo Installation
Porto provides extremely easy - one click demo installation. In order to do demo installation, you should import Static Blocks and CMS pages in Porto - Settings Panel > Installation.
-
Click 2
Importbuttons to prepare demo installation. -
Click
Demo Xbutton to install demo version that you prefer to install.
Quick Start Package
Package Installation
-
Package Files Upload
- Upload via FTPLog into your hosting space via a FTP software. ie, FileZilla.
Unzip
- Upload via CPanelTheme Package > Quick Start Package > Magento 1.9.3.6 > porto_3.0.0.zipand upload all directories and files to your root directory.Log into your CPanel(Control Panel) by your hosting account or cpanel user information.
Upload
Theme Package > Quick Start Package > Magento 1.9.3.6 > porto_3.0.0.zipto your magento root directory and unzip its content. -
Restore sql dump file
Unzip
Theme Package > Quick Start Package > Magento 1.9.3.6 > database_porto_3.0.0.sql.zipand create a new database, and import the sql file into your database. -
Disable compilation mode in
System > Tools > Compilation. -
Disable all cache related section that you have in your magento.
Important!
To apply the your changes working, you should disable or clear all of cache related sections, such as magento default cache, magento cache extension or CDN etc. The best choice is to disable all of them and enable it after you finish your work.
-
Log out from magento admin panel and log in again. Its essential to Logout/Login again to refresh your control panel.
Demo Installation
Porto provides extremely easy - one click demo installation. In order to do demo installation, you should import Static Blocks and CMS pages in Porto - Settings Panel > Installation.
-
Click 2
Importbuttons to prepare demo installation. -
Click
Demo Xbutton to install demo version that you prefer to install.
Theme Configuration
Homepage Configuration
How to edit homepage slider?
Once you finish demo installation, you can get same slider content as our demo sites. To edit these slider content, please go to Admin Panel > CMS > Static Blocks and select necessary static block. You can modify slider content by custom HTML based on sample content.
How to show products in homepage?
-
Bestsellers - It shows the products by selling automatically.
{{block type="filterproducts/bestsellers_home_list" ... }} -
Featured Products - It shows the products which "Is Featured" attribute is "yes".
{{block type="filterproducts/featured_home_list" ... }} -
Most Viewed - It shows the products by selling automatically.
{{block type="filterproducts/mostviewed_home_list" ... }} -
New Products - It shows the products which "New from Date" or "New to Date" attributes are inputed.
{{block type="filterproducts/newproduct_home_list" ... }} -
Latest Products - It shows the products which all products sort by latest input automatically.
{{block type="filterproducts/latest_home_list" ... }} -
Sale Products - It shows the products which "Special Price" is inputed.
{{block type="filterproducts/sale_home_list" ... }}
Classic Design

Morden Design

You can add the block code into the cms content field like below.
Below example is for showing new products block with 4x3 grid mode of one category which its id is 23.
{{block type="filterproducts/newproduct_home_list" name="newproduct_list" product_count="12" column_count="4" category_id="23" template="filterproducts/grid.phtml"}}You can add the attributes "product_count", "column_count", "category_id", "aspect_ratio", "image_width", "image_height", "lazy_owl" into the filter products blocks as above code.
"column_count" attribute will work with only grid.phtml and "lazy_owl" attribute will work with only list.phtml.
You can use the template files like "filterproducts/grid.phtml"(for grid mode), "filterproducts/list.phtml"(for owl-slider mode), "filterproducts/sidebar_list.phtml"(for sidebar mode), "filterproducts/small_list.phtml"(for small list mode).
Above image is the screenshot for "owl-slider mode and small list mode, and below image is the screenshot for grid mode.
If you're using owl-slider mode, you should add also the script for owl-slider like this.
<script type="text/javascript">
    jQuery(function($){
        $("#bestsellers_product .filter-products .owl-carousel").owlCarousel({
            lazyLoad: true,
            itemsCustom: [[0, 1], [320, 1], [480, 2], [768, 3], [992, 2], [1280, 3]],
            responsiveRefreshRate: 50,
            slideSpeed: 200,
            paginationSpeed: 500,
            scrollPerPage: false,
            stopOnHover: true,
            rewindNav: true,
            rewindSpeed: 600,
            pagination: false,
            navigation: true,
            autoPlay: true,
            navigationText:["<i class='icon-left-open'></i>","<i class='icon-right-open'></i>"]
        });
    });
</script>
How to add Instagram on Homepage?
Porto Magento theme does support you to add the Instagram Feed on the Homepage.

Please try to use below example code.
{{block type="core/template" padding_item="10px" template="socialfeeds/instagramphotos.phtml" }}
Besides, you can config the Instagram Feed on Homepage by going to Admin Panel > System > Configuration > SW EXTENSION > Social Feeds > Instagram

To get the Instagram Feed works, you need to insert the right AccessToken and UserID of your Instagram account.
Ahout how to get those info, please follow this guide.
Menu Configuration
General Information
Porto eCommerce provides powerful and most advanced menu, we're going to describe detailed instructions how to use this powerful menu features as our demo site.
Necessary Menu Settings
For general menu settings, please go to Smartwave Extensions > Mega Menu and follow instructions there. It describes how to:
- set default menu type for all menu items
- show "home" link
- show category labels such as "New", "Hot" as our demo site
- show custom links into menu, for example, "Features" menu that you can see from our demo
How to add a menu item that has fixed-width mega menu?
-
Add new cateogry and necessary subcategories for dropdown content.
-
Set "Menu Type" field as "Static Width".
-
Set "Static Width" for the fixed mega menu as your needs. For example, 600px.
-
Set "Sub Category Menu Columns" for the your menu popup level. For example, 2.
-
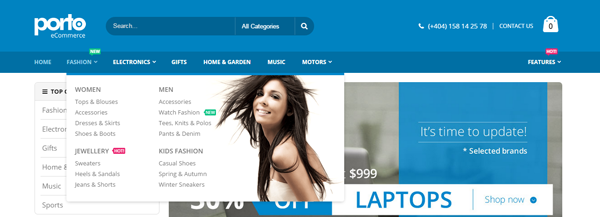
Set Block Width that you prefer to add image or custom block as right image. For example, set 5 - (it means it will take 5 columns area from 12 columns) for "Block Right Width(%)", right block will be 250px in this case.
-
Add custom block to show in the mega menu. For example, please add follow codes.
<img src='{{media url="wysiwyg/porto/category/banner/fashion_b.png"}}' alt='' style='position: absolute;right: 10px;top: -10px;height: 273px;width: auto;max-width: none;z-index: -1;border-radius: 8px;' />
How to add a menu item that has full-width mega menu?
-
Add new cateogry and necessary subcategories for dropdown content.
-
Set "Menu Type" field as "Full Width".
-
Set "Sub Category Menu Columns" for the your menu popup level. For example, 3.
-
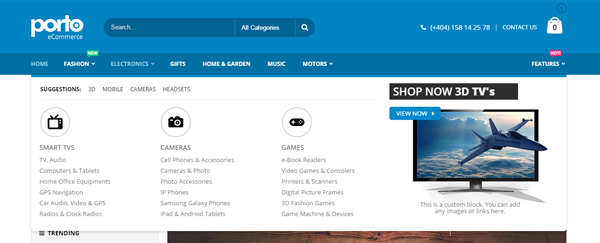
Fill "Block Top" field to show custom content in the top area as the right sample screenshot. For example,
<div style="margin: 0 20px;padding: 10px 0 15px;border-bottom: 1px solid #eee;width: 63%;color: #000;"> <b style="margin-right: 15px;">SUGGESTIONS:</b> <a href="#" style="margin-right: 15px;color:#000">3D</a> <a href="#" style="margin-right: 15px;color:#000">MOBILE</a> <a href="#" style="margin-right: 15px;color:#000">CAMERAS</a> <a href="#" style="color:#000">HEADSETS</a> </div> -
Set Block Width that you prefer to add image or custom block as right image.
For example, set 5 - (it means it will take 5 columns area from 12 columns) for "Block Right Width(%)", right block will be 250px in this case. -
Add custom block to show in the mega menu. For example, please add follow codes.
<div class="menu-right-block" style="position: relative;text-align:center;">
    <img src="{{media url="wysiwyg/porto/category/banner/electronic.png"}}" alt="" style="margin-top:20px"/>
    <div style="position: absolute;top: -35px;left: -15px;text-align: left;">
        <h2 style="font-size: 23px;font-weight: 600;color: #fff;background-color: #2e2e2e;line-height: 1;padding: 6px 50px 6px 8px;">SHOP NOW <b style="font-weight:700;">3D</b> <strong style="font-weight: 800;">TV's</strong></h2>
        <a class="btn btn-default" style="padding: 5px 7px 5px 15px;color: #fff; border: 0;font-size:13px;" href="https://www.portotheme.com/magento/porto/index.php/electronics.html">VIEW NOW <em class="icon-right-dir"></em></a>
    </div>
    <div style="position: absolute;bottom: 8px;width: 60%;text-align: center;left: 50px;line-height: 14px;font-size: 13px;">This is a custom block. You can add any images or links here.</div>
</div>

How to add a menu item that has classic dropdown menu?
-
Add new cateogry and necessary subcategories for dropdown content.
-
Select the menu item that you just created, and go to "Menu" tab.
-
Choose "Menu Type" field as "Classic".
How to Add or Remove a custom link in the menu?
After you finish theme installation, you can find a custom menu "Features" in your store. If you want to add/edit or remove this custom menu, please go to CMS > Static Blocks > porto_custom_menu, porto_custom_menu_mobile and edit html codes in static block.
Category Page Configuration
Category Page Banner Configuration
Porto eCommerce provides several types of category banner mode, static image, slider, full width, boxed width etc. You can choose one as your choice.
-
Go to the Manage Categories page to follow
Catalog > Manage Categories. -
Select
Default Categoryin the treeview area at the left side. -
Click
Add Subcategorybutton, then input Category name, Description, etc. Notes: set the optionsIs Activeto "Yes",Include in Navigation Menuto "Yes" inGeneral Informationtab. -
If you want to display banner image, please set image in
General Informationtab.
-
In order to display banner with static block, please set CMS Block in
Display Settingstab.
-
In order to display full width banner, please input html codes for the full width banner in
General Informationtab. Please don't forget, the configurationShow Category Description below of the Headershould be "Yes" inSystem > Configuration > Porto > Porto - Settings Panel > Category View.<div class="full-width-image-banner" style="background: url({{media url="wysiwyg/porto/category/banner/full-width-banner.jpg"}}) 50% 50% no-repeat;background-size:cover;"> <div class="content" style="position:absolute;z-index:1;top:50%;width:100%;text-align:center;"> <h2 style="color: #fff;font-weight: 600;">CATEGORY <b style="font-weight: 800;">BANNER</b></h2> <p style="color: #fff;font-weight: 300;">Set banners and description for any category of your website.</p> </div> </div>
- Click
Save Categorybutton, to update your changes.
Category Grid Mode Configuration
Porto eCommerce provides lots of category variation. For example, 2~8 columns mode, show or hide necessary button and links("Add to Cart", "Add to Compare" and "Add to Wishlist"), and show them inside or under product image.
Category Layout Settings
You can choose 1 Column(without sidebar), 2 Columns(left sidebar or right sidebar) and 3 Columns Layout mode(left sidebar and right sidebar) by magento's default features, please go to Catalog > Manage Categories > Custom Design tab > Page Layout option and choose the layout as your choice.
Category Column Settings
You can choose any column mode between 2~8, please go to System > Configuration > Porto Settings Panel > Category View(Grid Mode) and choose options as your choice.
Button, Links Setttings
Please go to System > Configuration > Porto Settings Panel > Category View, Category View(Grid Mode) and choose options as your choice. All setting's names will give you their meaning enough.
Product Variations Configuration
General Information
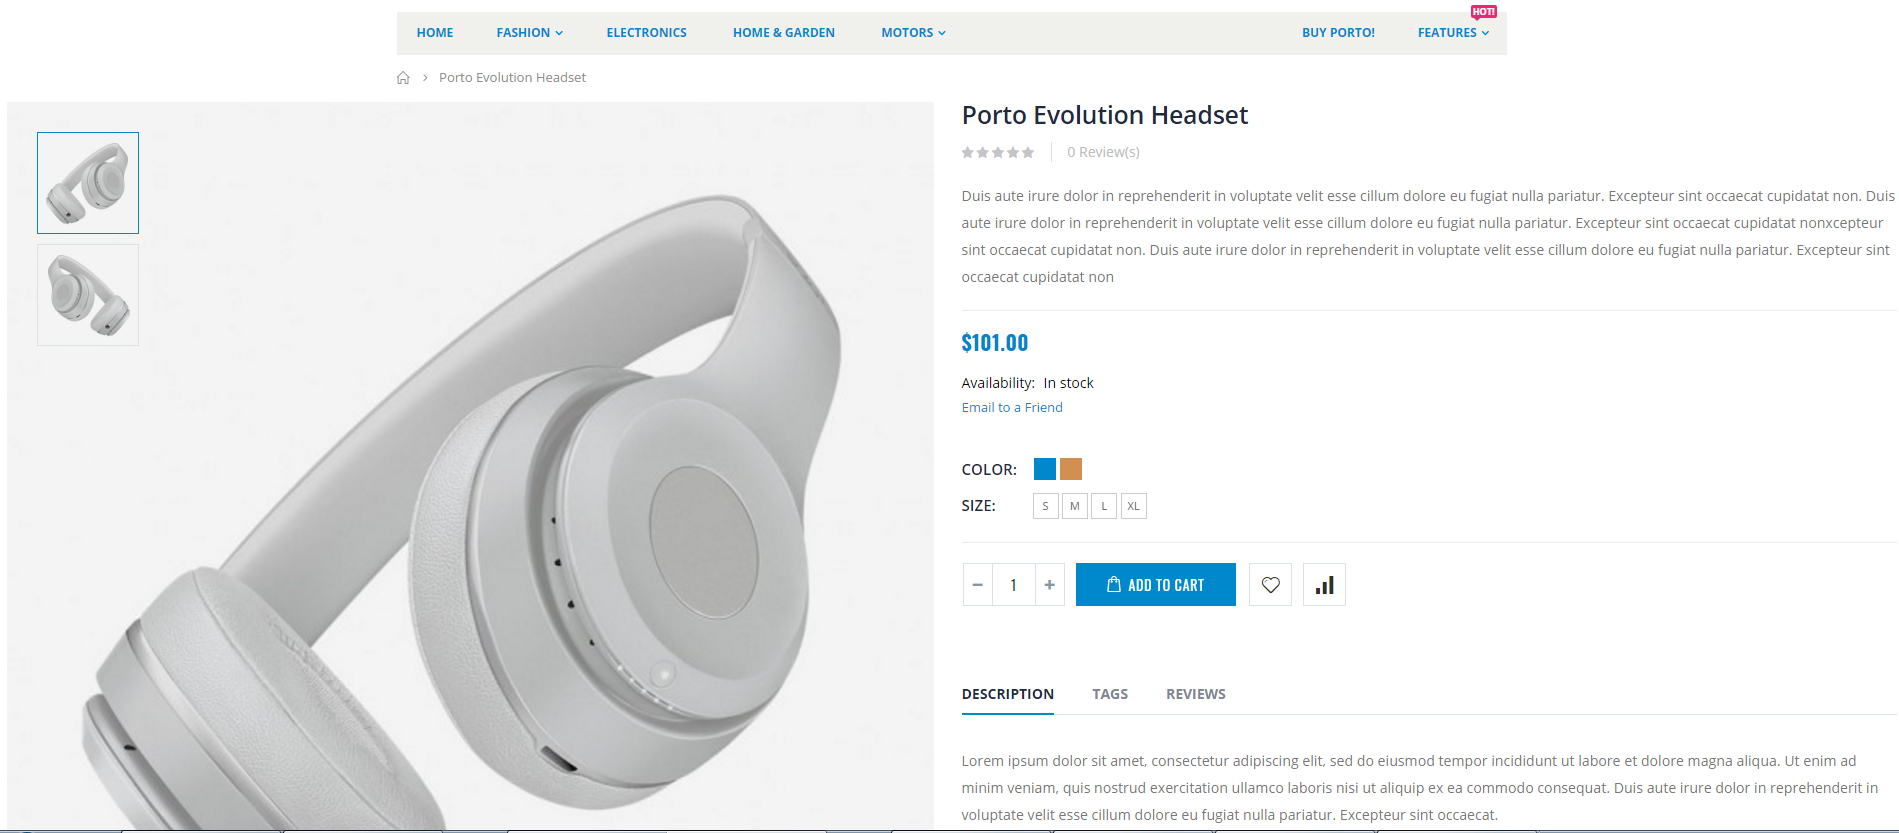
Porto eCommerce provides serveral variations of the product detail page, Default Type, Extended Type, Full Width, Grid Images, Sticky Left Right Info, Sticky Right Info, Vertical Tumbnail Images.
You can choose one of the product page types, please go to System > Configuration > Porto Settings Panel > Product View > Product Page Type and choose option as your choice. Those types will work well with 1 column page layout.
Catalog > Manage Products > [Add or Edit your product]. You should assign the attributes for your attribute sets, product_page_type, product_image_size, custom_block, custom_block_2, if there is no options. custom_block, custom_block_2 won't work with some of the product page types, so custom_block will work with Extended Type, Full Width, Sticky Left Right Info, Sticky Right Info and custom_block_2 will work with only Extended Type.
Default Type

Extended Type
Product Images will be shown with owl carousel, you can input below sample custom blocks for this type as demo.

<div class="custom-block custom-block-1">
	<div>
		<i class="icon-shipped"></i><h3>FREE<br/>SHIPPING</h3>
	</div>
	<div>
		<i class="icon-us-dollar"></i><h3>MONEY BACK<br/>GUARANTEE</h3>
	</div>
	<div>
		<i class="icon-online-support"></i><h3>ONLINE<br/>SUPPORT 24/7</h3>
	</div>
</div><div style="background:url({{media url="wysiwyg/porto/product/extended_product_video.jpg"}}) no-repeat;background-size: cover;padding:100px 0; text-align:center;">
<h3 style="font-family:'Open Sans';font-size: 35px;font-weight: 600;color: #21293c;">Concept Film</h3>
<a style="font-weight: 600;color: #7b858a;font-size: 20px;line-height: 36px;text-transform:uppercase;text-decoration:none;" href="javascript:void(0)">Watch <img src="{{media url="wysiwyg/porto/product/extended_product_playicon.png"}}" alt="" style="opacity: 0.6;margin-left: 5px;position: relative;top: -1px;width:38px;" /></a>
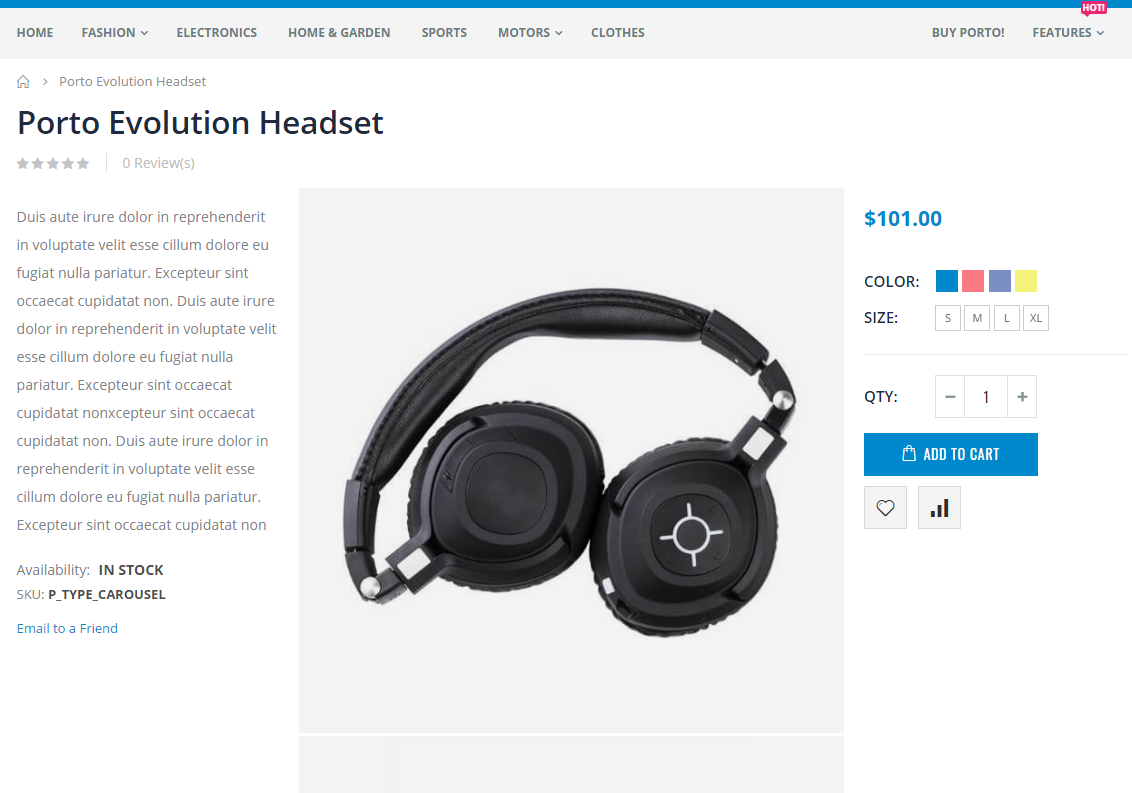
</div>Full Width
Product page content will be shown with full width, you can input below sample custom blocks for this type as demo.
<div style="background:url({{media url="wysiwyg/porto/product/shop1_fullwidth_product_video.jpg"}}) center no-repeat;background-size:cover;padding:100px 0;padding:5vw 0;text-align:center;">
    <a href="javascript:void(0)"><img src="{{media url="wysiwyg/porto/product/shop1_fullwidth_product_playicon.png"}}" alt="" /></a>
</div>
Grid Images

Sticky Left Right Info
Product informations will be shown by sticky at both side of the product images list, you can input below sample custom blocks for this type as demo.
<div class="fullwidth-row" style="background-color: #f4f4f4; padding: 100px 0;">
	<div class="container">
		<div class="row">
			<div class="col-md-4">
				<div style="overflow:hidden;">
					<h3 style="font-size: 20px; color: #21293c;position: relative;display: inline-block;font-weight:700;line-height:32px;margin-bottom:20px;">INCREDIBLE QUALITY<span style="position: absolute;border-top: 1px solid #21293c;top: 50%;margin-top: -0.5px;left: 100%;margin-left: 25px;width: 50vw;"></span></h3>
					<p style="line-height:24px;margin-bottom:20px;font-size:14px;">Sed do eiusmod tempor incididunt ut labore et dolore magna aliqua. Ut enim ad minim veniam, quis nostrud exercitation ullamco laboris nisi ut aliquip ex ea commodo</p>
				</div>
				<div style="overflow:hidden;">
					<h3 style="font-size: 20px; color: #21293c;position: relative;display: inline-block;font-weight:700;line-height:32px;margin-bottom:20px;">ADVANCED SOUND<span style="position: absolute;border-top: 1px solid #21293c;top: 50%;margin-top: -0.5px;left: 100%;margin-left: 25px;width: 50vw;"></span></h3>
					<p style="line-height:24px;margin-bottom:20px;font-size:14px;">Sed do eiusmod tempor incididunt ut labore et dolore magna aliqua. Ut enim ad minim veniam, quis nostrud exercitation ullamco laboris nisi ut aliquip ex ea commodo</p>
				</div>
			</div>
			<div class="col-md-4 a-center">
				<img src="{{media url="wysiwyg/porto/product/shop1_sticky_both_info_bottom-1.jpg"}}" alt="" style="max-width: 100%;"/>
			</div>
			<div class="col-md-4 text-right">
				<div style="overflow:hidden;">
					<h3 style="font-size: 20px; color: #21293c;position: relative;display: inline-block;font-weight:700;line-height:32px;margin-bottom:20px;"><span style="position: absolute;border-top: 1px solid #21293c;top: 50%;margin-top: -0.5px;right: 100%;margin-right: 25px;width: 50vw;"></span>ULTRA BOOST</h3>
					<p style="line-height:24px;margin-bottom:20px;font-size:14px;">Sed do eiusmod tempor incididunt ut labore et dolore magna aliqua. Ut enim ad minim veniam, quis nostrud exercitation ullamco laboris nisi ut aliquip ex ea commodo</p>
				</div>
				<div style="overflow:hidden;">
					<h3 style="font-size: 20px; color: #21293c;position: relative;display: inline-block;font-weight:700;line-height:32px;margin-bottom:20px;"><span style="position: absolute;border-top: 1px solid #21293c;top: 50%;margin-top: -0.5px;right: 100%;margin-right: 25px;width: 50vw;"></span>NOISE REDUCTION</h3>
					<p style="line-height:24px;margin-bottom:20px;font-size:14px;">Sed do eiusmod tempor incididunt ut labore et dolore magna aliqua. Ut enim ad minim veniam, quis nostrud exercitation ullamco laboris nisi ut aliquip ex ea commodo</p>
				</div>
			</div>
		</div>
	</div>
</div>
Sticky Right Info
Product informations will be shown by sticky at right side of the product images list, you can input below sample custom blocks for this type as demo.

<div class="custom-block custom-block-1">
	<div>
		<i class="icon-shipped"></i><h3>FREE<br/>SHIPPING</h3>
	</div>
	<div>
		<i class="icon-us-dollar"></i><h3>MONEY BACK<br/>GUARANTEE</h3>
	</div>
	<div>
		<i class="icon-online-support"></i><h3>ONLINE<br/>SUPPORT 24/7</h3>
	</div>
</div>
Vertical Thumbnails

Custom Tabs Configuration
General Information
Porto eCommerce provides powerful and most advanced product custom tabs, we're going to describe detailed instructions how to use this powerful custom tab features as our demo site.
Custom Tab Settings
For general tab settings, please go to Porto - Settings Panel > Custom Tabs on Product View and follow instructions there. It describes how to:
- Set "Show Custom Tabs" to "Yes".
- Set "Show Tabs by Settings from Parent Categories" to "Yes", if you want to show the custom tabs by category settings.
- Set "CMS Block Tab #1-5" to "Enable", if you want to show the custom tabs with the static block contents, then input the static block ids into "Static Block ID #1-5".
- Set "Attribute Tab #1-5" to "Enable", if you want to show the custom tabs with the product attributes, then input the attribute codes into "Attribute Code #1-5".


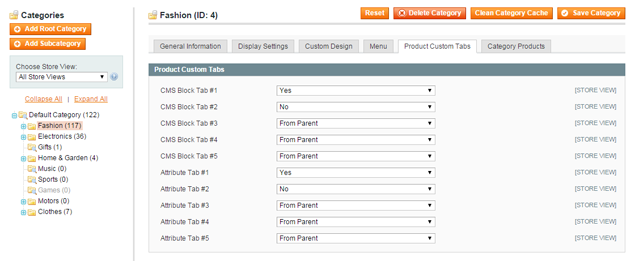
For show the custom tabs by category settings, please go to Catalog > Manage Categories and follow instructions there. It describes how to:
- Select dropdowns to "Yes", if you want to show the custom tabs for the children products in this category.
- Select dropdowns to "No", if you want to don't show the custom tabs for the children products in this category.
- Select dropdowns to "From Parent", you can determine whether to show or not the custom tabs, according to parent category settings.
Translation
Theme Translation
Most of themes require some additional touches to be fully translated, because they add their own CMS content or express default magento words in other words. In this page, we're going to show you 6 easy steps to make a theme fully translated. Just follow them up and let us know if you still have any issues with theme translation.
-
Get Translation Files For Default Magento Interface
The first step is to go ahead and download the official Magento translation packages. Be sure to download the actual package and not the inline or string list. We won't be using those translation methods in this guide. Once that is done, decompress the file and upload the /app folder of your Magento store's root directory. It's easy-peasy.
-
Create Store Views For Every Language
Now that the Magento translation files have been uploaded on your serve, it's time to create the various store views associated with each language.
First, navigate to
System > Manage Storeswhich can be found easily by using the Magento backend's header menu. From here, you'll be able to create new store views as well as edit the names of the existing ones. We suggest you change the default store view's name to English to keep your naming convention convenient.Once, you've created the store the views. You will have to navigate to
System > Configurationand ensure that you set the current configuration scope to your new language. Select the appropriate language from the locale dropdown on the General/General configuration page.
-
Why Your Theme is not Fully Translated?
After creating the store views and associating them with the appropriate locale file, you might notice that some text portions of your Magento theme have already been translated in the front end. This is because those particular strings use the same wording that is used in the default Magento theme. Yet, most good Magento theme developers will have modified the default text and added strings of their own. In addition, you'll most likely have created a number of static blocks and pages that will need translating as well.
Don't worry! You're halfway through translating your Magento theme.
Depending on how many pages and static blocks you have, that might have been a lie. This is where actual Magento translation grunt work actually begins.
-
Translate All Static Blocks
Navigate to
CMS > Static Blocks. Go through every single block that currently exists, and set their store view to your default language. In our case, it's English.
translating english static block Next, you'll want to start creating blocks that will replace them in your translated Magento theme. You're best bet is to come up with a naming convention that will make it easier when it comes to translating your pages. In my case, I tend to append a language code such as _en or _fr to all my static blocks. translating french static block Once that's done, verify that you have not forgotten to translate the actual content of any of your newly created

static blocks for your new store views. If you don't translate them, you won't end up with a fully multilingual Magento theme.
-
Translate All Pages
Repeat the same process that you have just done with the pages found in CMS/Page. The only difference is that you'll have to keep an eye open for calls to your static blocks.
Whenever you see something similar to
{{block type="cms/block" block_id="static_block_1" template="cms/content.phtml"}}, you'll have to be sure to append the appropriate language code to the store view you have selected for the page. -
Complete a Magento Translate.csv For Your Theme
Now that all the text that can be customized in the backend of your Magento theme has been translated, it's time to fix all other text. Open up Excel, or whatever spreadsheet editor you prefer, and start jotting down all the text lines lines that still do not appear translated in your theme in the first column. In the next column, write the translation as it should appear on the new store view.
Save it as CSV and name it translate. Upload translate.csv to the appropriate language folder in your Magento theme's locale folder. In some cases, you will have to create a folder. This is often found in a similar path to
app/design/frontend/default/theme_name/locale/language_name.Dealing With Variables
Remember that not all information displayed in your theme is 100% static. In some cases, the code used to display the text includes a variable. Usually, you can use %s to take the place of that variable in your translate.csv. If that doesn't work, check the actually php code that is displaying the text and use the exact same variable that you see there.
Language Flag
If you have more than one store view in your store, the store view selector will be displayed at the top of the page as a selectbox. You can enable different language for each store view.
For each available lanugage a flat is displayed in the store view switcher. Flag images(PNG, 16*12 pixels) should be uploaded to skin/frontend/porto/default/images/flags folder.


