8 Tips for Image Editing on your Website
You take a picture on your high-end Sony Alpha 7R V or your iPhone 16 Pro Max, shot at the highest resolution setting, ready to be the hero image on your website. Next, you need to make some edits to those pictures, get rid of those blemishes, maybe transform it to make it look kind of edgy, or more professional or even contemporary. And you’re going to need tools for that.
But even before you start editing, how are you transferring those photos? Are you dragging them through Google Drive, syncing through iCloud, or sending them over WhatsApp? Between compression issues, resolution loss, and messed up formatting, there’s a lot that can go wrong.
These practical, pro-level tips will help you handle your images the right way and get the best possible results when editing photos for your website.
1. Use High-Quality and Sharp Images
This is pretty much an unwritten rule. A blurry or pixelated image will cheapen your content so much so that you will notice a drastic difference in the traffic. High-quality images not only create visual appeal but also build trust, especially important if you’re selling a product, promoting a service, or sharing expertise.
If you happen to have settled with an image already and can’t seem to find an alternative to that (run down) image, don’t discard it just yet. Tools like BeautyPlus’s photo quality increaser can upscale your images, sharpen details, and fix color balance with just one click. This will save you the effort and money from buying expensive gadgets and fix your website reputation in the snap of a finger.
2. Apply a Consistent Filter or Color Grading Style
A consistent color palette or filter helps unify your content, making your brand or aesthetic instantly recognizable. You may have noticed how a lot of brands have a consistent theme throughout their website, and at times it can impact on the viewer’s perception of the brand. You may want to consider this rule with the images you are using too.
Stick to one or two editing styles across your website, social posts, and newsletters. You can look for filters on tools like BeautyPlus and run your images through that to match your unique brand style.
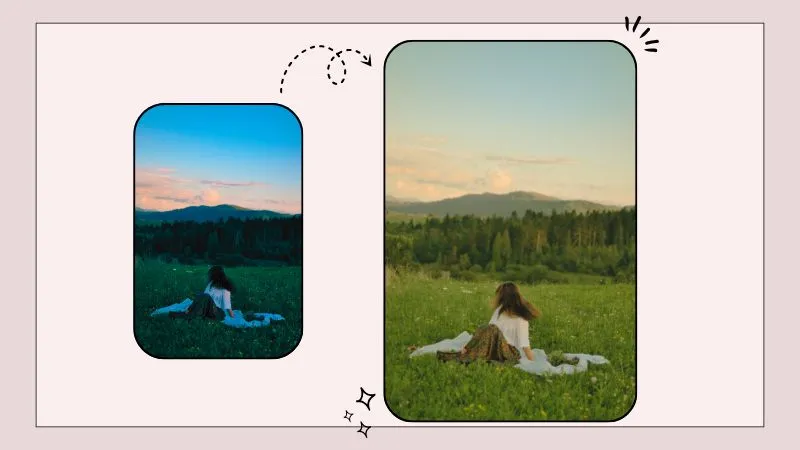
3. Optimize Image Size and Composition for Different Devices
Most users access content through mobile devices, but tablets and desktops still matter. That’s why you should always test your images across various screen sizes. Images that look perfect on the desktop can completely throw you off guard if you open them on your mobile device.
So yes, you’re probably going to have to worry about how your horizontal image will appear on vertical screens. Instead of stretching or distorting it, use the Photo Extender AI tool by BeautyPlus. It uses AI to naturally fill out the edges of your photo so you can reframe it without losing quality or focus.
4. Keep Compositions Clean and Focused
You wouldn’t want your website cluttered with images and infographics. This will easily overwhelm anyone who visits your site. Your images should have a clear subject, well-balanced spacing, and minimal distractions in the background. Basically, guide the viewer’s eye, don’t just fill space.
When capturing or editing photos, use basic design principles like the rule of thirds. For busy shots, you can crop in tighter or use tools to blur or remove unwanted elements to draw focus on your message or produce instead. A good object remover that always gets the job done right is Beautyplus object remover which makes this easy, so you don’t need to redo your whole shoot when something feels “off”.
5. Compress Images to Reduce File Size Without Losing Quality
Large image sizes slow down your website, which means longer loading times, more buffering, and ultimately less traffic and way less user retention. While shrinking image size is always a good option it can at times sacrifice image quality. The trick is smart compression.
Many modern image editing tools, including BeautyPlus, offer automatic compression settings that preserve resolution while minimizing file weight. For websites, aim to keep image files under 500KB where possible, especially for hero banners or thumbnails.
6. Be Mindful of How Different Cultures Perceive Images
What feels fun and vibrant in one culture might read as loud or inappropriate in another. If you’re creating content for global audiences, be aware and mindful of visual symbols, color meanings, and representation in your imagery.
For example, red can signify luck in China, but danger in Western contexts. Similarly, photos featuring hand gestures, religious symbols, or clothing styles can carry very different connotations depending on who’s viewing them.
Whenever possible, use inclusive imagery such as show diverse skin tones, body types, and settings. It is always worthwhile, learning about diversity, especially if your audience is diverse. They would appreciate being seen and this will only benefit your brand.
7. Avoid Overly AI-Generated or Unnatural-Looking Photos
We’re in the age of AI-enhanced everything, but there’s a fine line between enhancement and over-editing. When photos start to look too smoothed, too symmetrical, or too “perfect”, they lose authenticity and may even feel off-putting.
Use AI tools like skin retouching, filters, or background editors lightly and intentionally. Let natural textures and imperfections remain visible when appropriate. BeautyPlus does a great job here, offering customizable sliders so you can dial edits up or down based on the platform or photo type.
If you’re unsure, compare the before and after versions. Does the edited image still look like it belongs in the real world? If not, scale it back.
8. Always Check for Image Copyright and Usage Rights
Just because an image is on the internet doesn’t mean it’s free to use. Using copyrighted photos without permission can land you in legal trouble, even if it was unintentional.
Use royalty-free stock libraries like Unsplash, Pexels, or Pixabay, or better yet, create your own visuals. When using AI-generated images, check the terms of use from the platform. Some tools don’t allow commercial usage without licensing.
If you collaborate with photographers or designers, clarify the image rights up front: Who owns what? How long can you use it? Is credit required?
Proper attribution builds trust and ensures your content stays compliant across platforms.
Bottom Line
If there were no AI yet, you’d still be spending hours making a simple edit like removing a blemish or coloring the hair on a portrait. AI has given more value to human time so we can focus on what actually matters. Creativity. It helps us bring ideas to life. And the same goes for how we edit pictures. It has completely changed the game.
No matter what you’re using your website for, the quality and choice of images will always matter. If you’re running a brand, your clients will trust you more and feel drawn to your services or products. If you’re running a blog, users will stay longer and actually pay attention. Safe to say, pictures are important. And investing a little time into getting good edits will only do you good.
Leave a Reply