The Ultimate IMEI Check Guide: Everything You Need to Know Before Buying a Phone
Why Your Phone’s IMEI is the Most Important Number You Don’t Know
Imagine finding an affordable used phone. It looks great. However, inserting your SIM card shows No Service or you discover it was stolen or carrier-locked. The great deal suddenly becomes a nightmare. This is why IMEI matters.
It checks any phone’s background. You can check a phone’s safety, cleanliness, and readiness with one code. This is quick and straightforward with Wondershare IMEI Check. Never get stranded with a defective phone again—it checks its status in seconds. This article will guide you on checking your IMEI number and things to check before buying a phone.
What is an IMEI Number? (The “Phone Fingerprint”)
Every phone has a unique IMEI number. Consider it your phone’s fingerprint. No two phones have the same IMEI.
This number helps networks and services identify devices. It blocks stolen phones for carriers. Repair shops check warranties with it. It allows buyers to verify a phone’s authenticity and safety.
A device’s IMEI indicates its model, condition, and possibly provenance. Be sure to check it before purchasing or selling a phone. With one number, you can learn practically everything about a device’s history.
How to Find Your IMEI Number (3 Simple Methods)
Before checking a phone, get its IMEI. The easiest way to find it.
Method 1: Dial a Code
Before checking anything on your phone, you first need its IMEI number. Here are the easiest ways to find it.
Step 1. First, open the phone’s dial pad.
Step 2. Type *#06# and enter.
Step 3. Screen displays IMEI, note it down or save it somewhere.
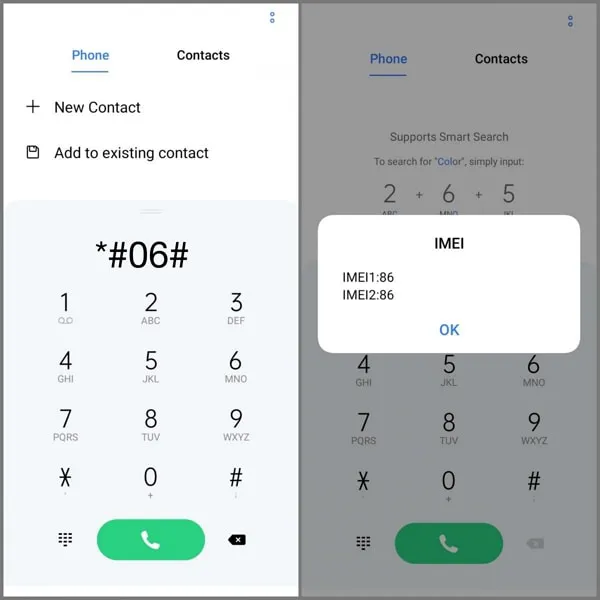
This works on most phones quickly and easily.
Method 2: Check in Device Settings
Here’s how to check IMEI number in device settings:
Step 1. Open phone Settings on your device.
Step 2. Select “About Phone.”
Step 3. Tap “Status>IMEI.”

Step 4. Copy the IMEI number and save it.
This is useful for double-checking correctness.
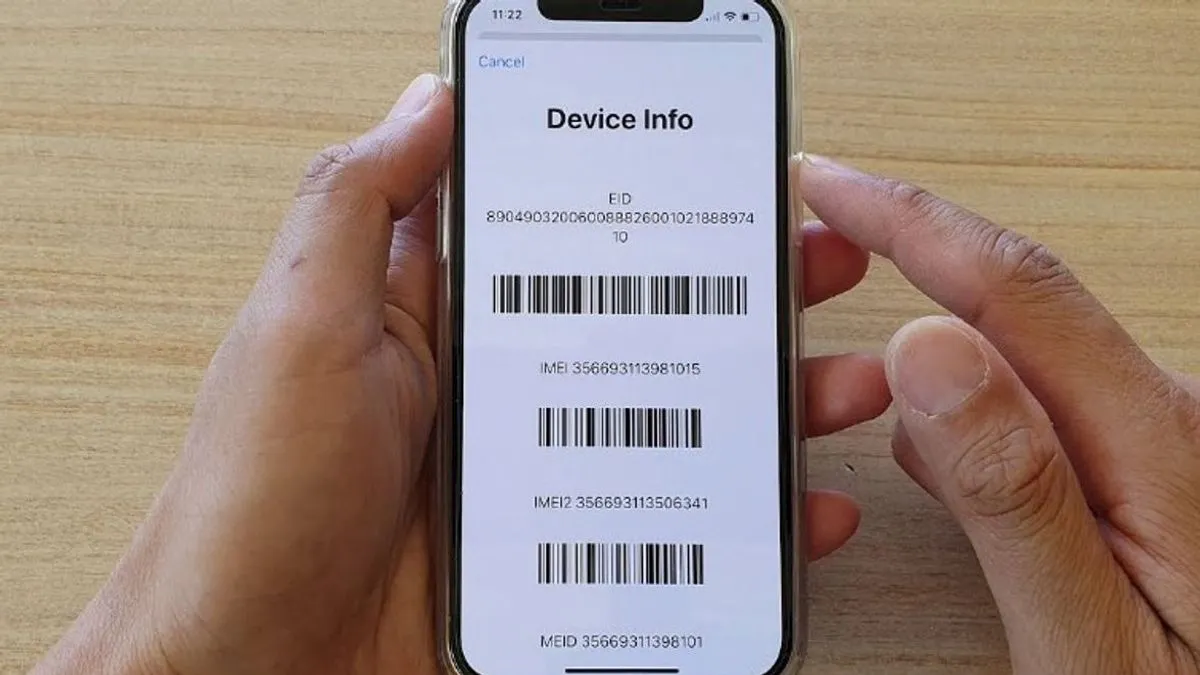
Method 3: Look at the Phone or Box
If you can’t access the phone settings, you can still find the IMEI by checking the device itself or its original box.
Step 1. Remove the SIM tray to find the printed IMEI.
Step 2. If not, examine the phone’s box package label.
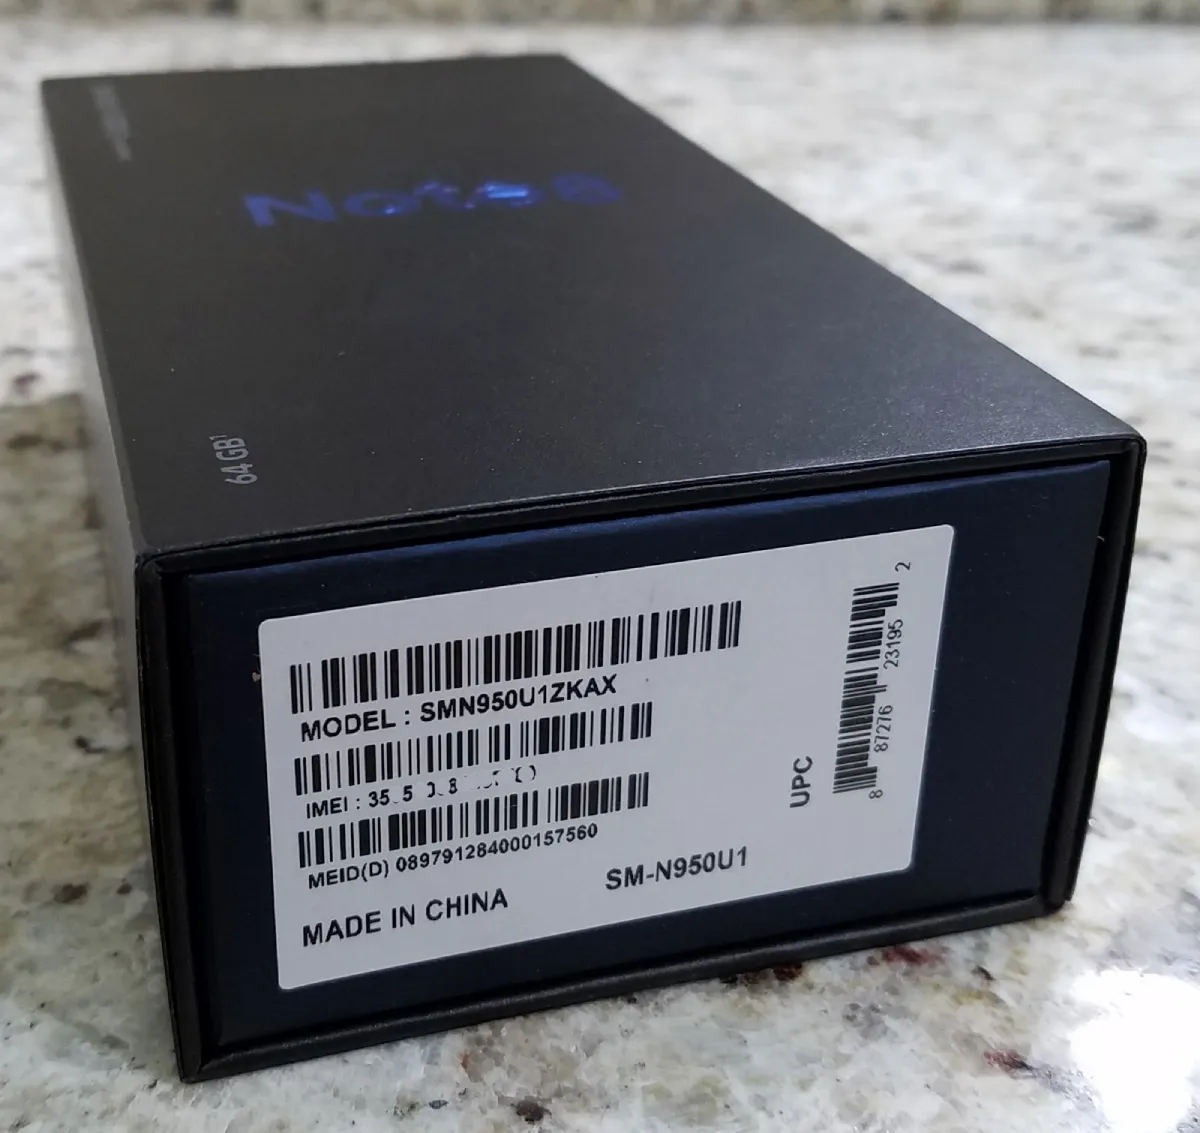
Step 3. Verify the number in Settings.
It helps when the phone won’t turn on.
The 5 Critical Checks You MUST Do Before Buying a Phone
Check the IMEI report before buying a device. These precautions prevent fraud and costly mistakes.
1. Blacklist & Lost/Stolen Status
Blacklisted phones may be stolen or linked to overdue debts. Blacklisted phones cannot use most networks.
2. Carrier Lock Status
Some phones are carrier-specific. Check for device lock before transferring SIM cards.
3. iCloud/Activation Lock (iPhone) or FRP/Google Lock (Android)
The phone cannot be set up with these locks. Their removal is restricted to the owner.
4. MDM (Mobile Device Management Lock)
Companies or schools own these phones. They may restrict apps or systems. Avoid buying such devices.
5. Warranty & Device Info
Avoid fraudulent or damaged phones by checking the purchase date, warranty status, model, storage, and authenticity.
Your Step-by-Step Guide to a Bulletproof IMEI Check with Dr.Fone IMEI Check
Before buying a phone, check for safety, cleanliness, and usability. The easiest way is with Dr.Fone IMEI Check. It produces fast, clear Android and iPhone results.
Simple online service Dr.Fone imei check scans your phone’s IMEI and displays all the vital facts. Blacklist, carrier lock, iCloud or FRP lock, warranty, KNOX Guard, device details, and more. The IMEI is just checked and never kept. Support is 24/7, and payments are secure.
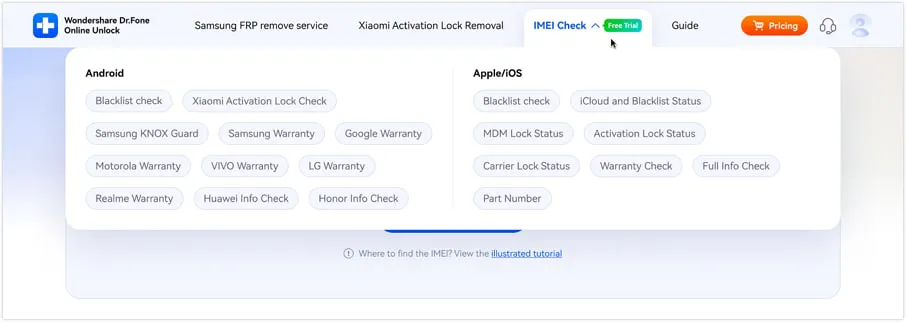
Key Dr.Fone IMEI Check Features
- Compatible with iPhone and Android
- 100% free first IMEI check
- Results appear in 1–30 seconds.
- Supports 20+ device checks
- Blacklist, carrier lock, iCloud lock, FRP lock, KNOX Guard, guarantee, etc.
- Secure platform with good reviews
- Clear, illustrated basic instructions
Step-by-Step Guide
Walk through the steps to do a comprehensive IMEI check without stress. The steps are straightforward.
Step 1. Visit the official IMEI check tool. Select Apple/iOS or Android from the top menu. This helps the tool check your phone correctly.
Step 2. The page has a clear input box. Enter your IMEI. Select “Check Now.” Click the Illustrated Tutorial for a step-by-step method for finding your IMEI.
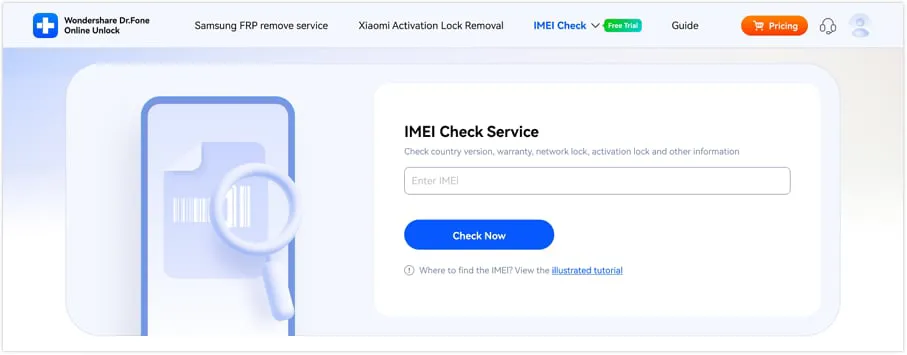
Step 3. The tool scans IMEI. It takes 1–60 seconds, depending on the device. First scan is free, so try it without joining up.
Step 4. A full report will show:
- Blacklisted status
- Carrier lock
- iCloud/FRP lock
- Warranty
- KNOX status
- Device info
Download by clicking “Save Report.” This aids phone purchase, selling, and unlocking.

Red Flags: How to Interpret Bad Results
If your IMEI report seems suspicious, act quickly. These red flags indicate a dangerous phone to use or buy.
- In case the phone is blacklisted, return it at once. A phone on a blacklist is most commonly a device that has been stolen, lost, or has some kind of debt associated with it. There is no way to solve this problem, and the phone will hardly work on any networks.
- Do not buy a phone with iCloud or Activation Lock. This lock is only removable by the owner. Have the seller unlock it in person. If they can’t do it immediately, the phone is unsafe.
- MDM Lock gives companies or schools control over phones. Not for free usage. Request that the seller’s IT team remove the lock. Avoid getting such phone if they decline.
Conclusion
Samsung IMEI checks are one of the best ways to safeguard yourself before buying or using a phone. It reveals unseen problems. A fast IMEI check can reveal a blacklisted, or locked phone. This protects you from scams, damaged devices, and SIM-uncompatible phones. IMEI checks are important whether buying used, transferring carriers, or repairing a phone. One minute can save you lots of money and stress.
Leave a Reply