Automate Location-Based WordPress Content Using IPGeolocation
Running a WordPress site means competing with millions of others for attention. When visitors land on your page, you only have a few seconds to show them something relevant. The problem is, showing the same generic content to everyone rarely works.
A visitor from New York doesn’t need to see content about your London office hours. Someone in Germany probably isn’t interested in your US-only shipping promotions. When your content doesn’t match a visitor’s location, you’re simply guessing what might work.
The solution? Automate your content based on where people actually are. Instead of creating multiple pages or guessing what might work, you can use location data to show the right message to each visitor automatically.
Why Automating Location-Based Content is a Game-Changer
Think about how you browse the web. When a site immediately shows you products available in your country, prices in your currency, or content in your language, it feels personal. You’re more likely to stick around and engage.
That’s the power of geo-personalization, and automation makes it easy to scale. You set the rules once, and the system handles everything else. A visitor from Canada sees Canadian content. Someone from Australia gets Australian-specific information. No manual work required after setup.
In the past, WordPress personalization usually meant complex setups or expensive enterprise tools. Not anymore. With the right tools, you can automate everything from content blocks to full-page redirects based on visitor location.
Benefits of Geo-Personalization
Let’s talk about what this actually does for your site:
Better engagement rates: When visitors see content that applies to them, they stay longer. A SaaS company showing region-specific case studies will see more time on page than one showing random examples.
Higher conversion rates: E-commerce sites that display local currency and available shipping options convert better. Simple as that. People want to know if they can actually buy what you’re selling.
Improved user experience: Nobody wants to click through multiple pages to find information relevant to their location. Automatic geo-targeting removes that friction entirely.
Smarter marketing spend: Why show everyone the same promotional banner when you can target specific regions with campaigns that actually apply to them? You’ll get more clicks and better ROI.
SEO benefits: Search engines love user-friendly experiences. When people engage more with your content because it’s relevant to them, your metrics improve. Lower bounce rates and longer sessions send positive signals to search engines.
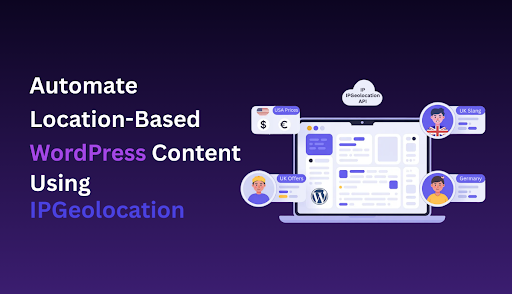
Meet IPGeolocation for WordPress
To make this work, you need a reliable way to detect visitor location and act on that data. That’s where a WordPress geolocation plugin comes in handy.
IPGeolocation offers a WordPress plugin that connects to their IP geolocation API. It detects where your visitors are coming from and gives you tools to personalize content accordingly. The plugin handles the technical work, so you can focus on creating better experiences.
Unlike some alternatives that only offer basic country detection, IPGeolocation provides detailed location data, including city, region, timezone, currency, and even ISP information. This level of detail gives you more ways to personalize the experience.
Key Features at a Glance
The plugin comes packed with features that make automation straightforward:
Geo-redirects: Automatically send visitors to location-specific pages or domains. Perfect for multi-regional sites or country-specific landing pages.
Content visibility control: Show or hide any content block based on location rules. This works with shortcodes, making it compatible with most page builders.
Currency and timezone detection: Display the right currency for e-commerce or show event times in the visitor’s local timezone.
Language switching: Redirect visitors to language-specific versions of your site based on their location.
IP whitelisting and blacklisting: Control access to certain content or features based on IP ranges or specific countries.
Developer-friendly hooks: Custom PHP code can tap into the location data for advanced use cases.
Easy Setup for Beginners
You don’t need any coding skills to get this running. The installation process follows standard WordPress plugin procedures:
Download the plugin from the WordPress repository or install it directly from your dashboard. After activation, you’ll get an API key from IPGeolocation’s website. The free plan includes 30,000 requests per month, which is enough for most small and medium websites.
Paste your API key into the plugin settings, and you’re basically done with the technical setup. The plugin starts detecting visitor locations immediately. From there, you can configure your geo rules through a visual interface.
The IP Location Lookup service behind the plugin is accurate and fast. It doesn’t slow down your site because the detection happens server-side, and results get cached for repeat visitors.
How to Automate Content and Redirects
Let’s get practical. Here’s how to set up common automation scenarios.
Creating Automated Geo-Redirects
Geo redirects help send visitors to the right regional site or location-specific page. Maybe you run separate sites for different markets, or you want to send visitors to localized landing pages automatically.
In the plugin dashboard, navigate to the geo redirect rules. You’ll create rules that define which countries trigger which redirects. For example:
- Visitors from the UK → redirect to yoursite.com/uk
- Visitors from Australia → redirect to yoursite.com/au
- Everyone else → stays on the main site
You can make these redirects conditional. Only redirect on the homepage, or only for first-time visitors. This prevents annoying people who deliberately visit your main site.
The plugin also supports temporary redirects (302) versus permanent ones (301), giving you SEO control. Use 302 for testing and 301 when you’re certain about your setup.
Displaying Location-Based Content Automatically
This is where location-based personalization becomes really useful. Instead of creating entirely separate pages, you can show or hide specific content blocks based on visitor location.
The plugin uses shortcodes for this. Wrap any content in a shortcode with location rules, and the plugin handles the rest. For example:
You could display different pricing tables for different regions, show location-specific testimonials, or highlight region-specific features of your product. The shortcode approach works with any WordPress page builder, so your existing workflow doesn’t change.
Location-based content doesn’t have to be all-or-nothing either. You can combine multiple rules, create fallback content for locations you haven’t specified, and nest shortcodes for complex scenarios.
Want to show content based on location but only during certain hours? You can combine location rules with time-based conditions for highly targeted campaigns.
Best Practices for Smarter Automation
Getting the technical setup right is one thing. Using geo-personalization effectively is another. Here are some practices that actually move the needle:
Test Your Redirects Thoroughly
Use a VPN or proxy to verify your geo rules work correctly. Nothing frustrates users more than broken redirects or seeing content that doesn’t apply to them. Before going live, check your automation from multiple locations to ensure everything behaves as expected.
Don’t Over-Personalize
Just because you can customize everything doesn’t mean you should. Focus on elements that genuinely improve the user experience. Excessive personalization can feel creepy or make your site harder to maintain. Pick the highest-impact areas and personalize those first.
Provide Manual Overrides
Some people use VPNs or travel frequently. Give them a way to manually select their preferred location or language. A simple dropdown in your header works well. This shows respect for user agency and prevents frustration when automatic detection gets it wrong.
Consider Legal Requirements
Different regions have different privacy laws. GDPR in Europe, CCPA in California, and others around the world. Make sure your location detection and data usage comply with applicable regulations. Consult with legal counsel if you’re collecting or storing location data.
Optimize for Performance
The plugin is fast, but too many complex rules can still affect performance. Cache aggressively and test your page load times after implementing geo-personalization. Use a performance monitoring tool to ensure your automation doesn’t negatively impact user experience.
Monitor for False Positives
IP-based geolocation is accurate but not perfect. Corporate VPNs, mobile networks, and proxy servers can sometimes misidentify locations. Check your analytics for unusual patterns and adjust your rules accordingly. Build in tolerance for edge cases.
Create Fallback Content
Always have default content for locations you haven’t specifically targeted. Empty sections or broken experiences hurt more than generic content. Your fallback should be as polished as your personalized content. It’s still representing your brand.
Tracking and Optimizing Your Geo-Personalization
You must determine whether your automation is truly functioning once it goes live. Measurement is important.
Use Google Analytics or your preferred analytics tool to track how different regions interact with your personalized content. Set up custom events for geo-redirects and content visibility changes. This shows you which locations engage most with which content types.
Create separate goals for different regions if conversions vary significantly. An ebook download might convert well in the US but poorly in Asia. Regional tracking helps you optimize each market independently.
A/B testing works here, too. Test different versions of location-specific content to see what resonates. Maybe German visitors prefer detailed technical specs, while UK visitors respond better to benefit-focused copy.
Pay attention to your bounce rates by country. If certain locations consistently bounce higher, your geo-targeting might not be working as intended. Either the content doesn’t match their needs, or there’s a technical issue.
The WordPress show content based on location feature gives you granular control, but it also means you need granular tracking. Tag your location-specific elements so you can measure their performance individually.
Wrapping Up: Make Your WordPress Smarter with IPGeolocation
Generic content is no longer enough. Your visitors expect relevant, personalized experiences, and manual personalization doesn’t scale.
Automating location-based content solves this problem elegantly. You set rules once, and your WordPress site adapts to each visitor automatically. Better engagement, higher conversions, and improved user experience all follow naturally.
The IPGeolocation plugin makes this accessible to anyone running WordPress. You don’t need a development team or a massive budget. Install the plugin, configure your rules, and let automation handle the rest.
Start simple. Pick one element to personalize, maybe a homepage banner or a specific product section. Test it, measure the results, and expand from there. Geo-personalization works best when you implement it thoughtfully, not all at once.
Your WordPress site can be smarter. It can show the right content to the right people at the right time. The technology is ready. The question is: are you?
Conclusion
Location-based automation transforms how your WordPress site connects with visitors. Instead of treating everyone the same, you deliver experiences that match where people actually are and what they actually need.
Moving from generic to personalized experiences no longer requires enterprise-level resources. With tools like IPGeolocation, small teams and individual site owners can implement sophisticated geo-targeting strategies that were once available only to major corporations.
The real power isn’t in the technology itself. It’s in how you apply it. Focus on solving real problems for your visitors. Remove friction. Show them the information they came looking for without making them hunt for it.
Whether you’re running an e-commerce store, a SaaS platform, a content site, or a local business with international reach, geo-personalization can make your site work harder for you. The setup is straightforward, the results are measurable, and the competitive advantage is clear.
Take the first step. Choose one aspect of your site to personalize based on location. Implement it, track the impact, and build from there. Your visitors will notice the difference, and your metrics will reflect it.
Leave a Reply