
From Blender Blockout to Final Shot: How Seedance 2.5’s 3D White-Model Previz Changes 3D Workflows
For most of my career in 3D, the hardest part was never the final render. It was the messy middle, the stretch where a scene exists only as grey shapes and I have to convince a client, or honestly just myself, that the idea works.
That grey-shape stage has a name. We call it the blockout, or the white model.
I would build a rough version of a scene in Blender. No textures, no lighting polish, just proportions and the camera move I had in mind. Then I would sit there knowing the distance between that blockout and a finished shot was days of work, and that I would not see whether the composition landed until I had already spent most of those days.
Seedance 2.5 closed that gap for me. ByteDance’s video model, which I now run through Topview, reads a 3D white model as a direct input and renders it into a textured, moving shot. The blockout stopped being a placeholder I had to imagine past. It became the seed of the final image.
This article is the workflow I built around that change. It starts on the Blender side, moves through the handoff into Seedance 2.5, and ends at a finished clip with a few honest notes about cost.
What a white model actually is
If you do not live inside 3D software, “white model” sounds like jargon. It is simpler than it sounds.
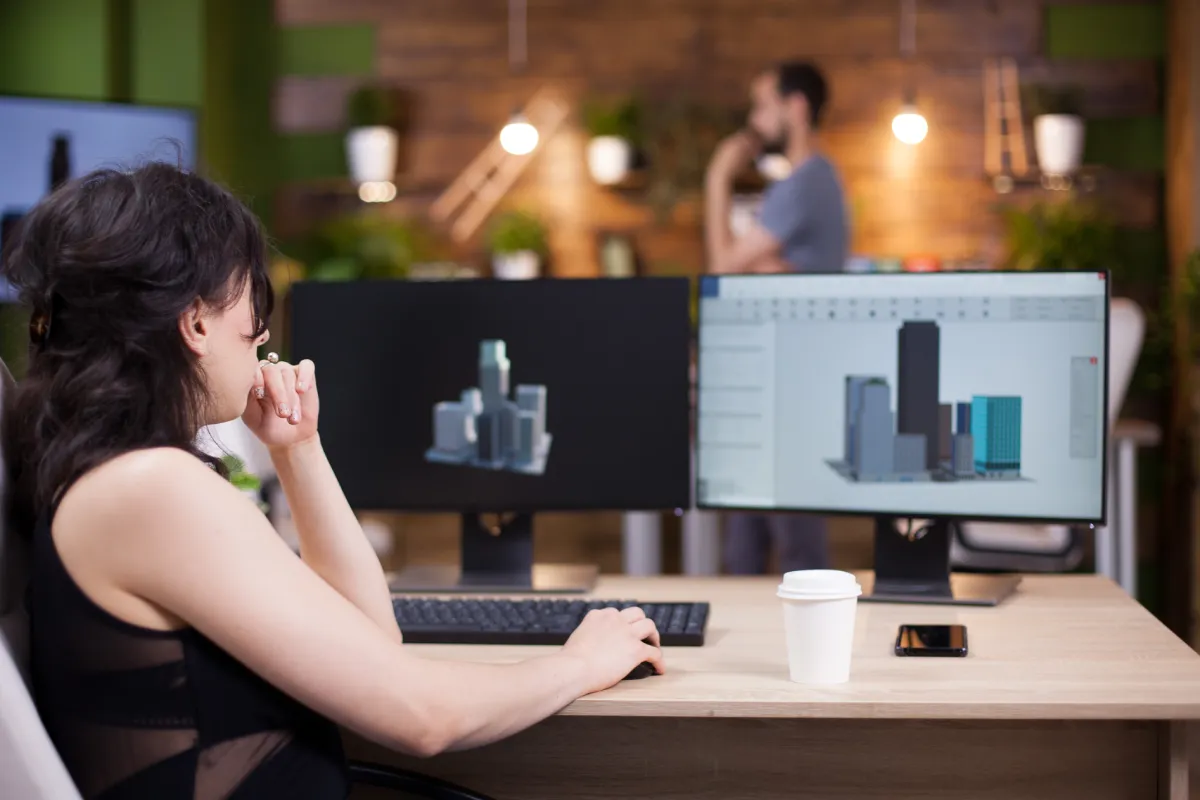
A white model is a scene built from basic geometry and nothing else. Characters are stand-in figures. A car is a smooth shape with no badge and no paint. Rooms are bare walls under flat grey shading, which is where the name comes from.
Artists use it to lock the bones of a shot before committing to detail. Camera position gets decided here. So does the scale of a character against a doorway, the placement of a prop, the path a lens travels across a room, and the headroom above a subject. These spatial choices are cheap to change at the blockout stage and expensive to change once textures and lighting exist.
In film this overlaps with previs, short for previsualization. The blockout is where you answer a blunt question: does this shot read? You answer it before anyone spends money making the shot pretty.
Blender is the tool I reach for, partly because it is free and open-source, partly because its viewport is quick for shoving shapes around until a frame feels right.
Here is the thing about the white model that held true for decades. It was always a means to an end. You built it, you judged it, then you threw most of it away and started the real work. Seedance 2.5 changes what that white model is worth, and the next section is where that starts.
Building a blockout the model can read
Before any of the AI part, the blockout has to be good. A model finishing my thought only helps if the thought is clear.
A few habits matter more now than they used to:
- Keep the geometry clean. Clear silhouettes give the model clear shapes to dress, while overlapping mush gives mush back.
- Set the real camera move in Blender, not a vague one. The lens path you animate is the lens path you get.
- Light it just enough to show form. Flat grey with a basic shadow reads better to the model than a pitch-black scene.
- Hold scale honest. If a character sits at the right height against a door, the rendered version keeps that believable proportion.
None of this is new craft. It is the same blocking discipline good previs always needed. What changed is the payoff. A clean blockout used to earn me a clearer mental picture. Now it earns me a watchable shot.
I will show the actual handoff next.
The handoff into Seedance 2.5
Here is the move that reorganised my pipeline.
I build the blockout in Blender the way I described above. Then I export it, either as a short clip of the grey scene or as stills, and hand it to Seedance 2.5 as a 3D white-model reference. Alongside it I add a style reference that tells the model what look I am going for.
The model treats the blockout as the spatial truth of the shot. It keeps my layout, my proportions, my camera move. Then it dresses the scene with materials and lighting, producing a stable clip that follows the geometry I gave it.
I want to be precise about what this is, because marketing around AI tools tends to blur it. There is no magic Blender button. Seedance 2.5 does not plug into Blender and take the wheel. What it offers is white-model input. My Blender scene becomes one of the references the model reads. The handoff is a file, not an integration.
That distinction works in my favour. It means the Blender skill I already have still carries its weight. A sloppy blockout gives a sloppy result, the same as it always did. A precise one gives the model a precise scene to dress.
The first time it worked, I sat back and realised my throwaway blockout had just become the most important asset in the shot.
Why the reference stack matters for 3D
A blockout tells the model where things are. It does not tell the model what they should look like. That is where the reference stack comes in, and for 3D work it is the part I underrated at first.
Seedance 2.5 accepts up to 50 multimodal reference inputs in one generation. Images, video clips, audio, style references, and the white model itself all draw from that pool. The older Seedance 2.0 line capped this near 12.
Fifty slots change how I brief a shot. Into a single generation I can feed:
- A white model for spatial layout and camera motion.
- Character reference images so faces and silhouettes stay consistent through the clip.
- Product or prop photos so a branded object matches the real one.
- Material and lighting references that set the mood.
The model reads these together, not one after another. So the geometry comes from my Blender scene while the surface identity comes from my reference images, and both hold steady across the shot. For a 3D artist used to babysitting consistency by hand, that is a quiet kind of relief.
The reason this holds across a longer shot rather than drifting halfway through has to do with how Seedance 2.5 builds duration in a single pass. I will come back to that near the end, because it matters for a specific reason in 3D.
The part 3D artists actually care about, which is camera
Ask any 3D artist what previs is for and you will hear the same word. Camera.
Composition is the whole game at the blockout stage. Where the lens sits, how it moves, what sits inside the frame and what gets cropped away. Get the camera wrong and no amount of texture saves the shot.
Seedance 2.5’s white-model input respects the camera I set in Blender. Push the lens in slowly across a room and the generated clip pushes in the same way. Frame a character off-centre against open space and that framing survives into the render. The spatial logic I blocked is the spatial logic I get back.
This is the difference between describing a camera move and showing one. I used to type “slow dolly in, low angle” and hope the model read me the way I meant it. Now I build the move in Blender, where I have real control over easing and timing, and the model follows it.
Prompt adherence improved alongside this. ByteDance reports roughly 20% better adherence in 2.5 than in 2.0, which in plain terms means fewer regenerations before a shot matches the brief. There is a cost angle hiding in that number, and I will pick it up in the access section, because regenerations are where credits and hours quietly vanish.
Iterating without starting over
Even with a strong blockout and a full reference stack, the first render is rarely the last. A client wants the jacket blue instead of red. The packaging copy needs a swap. The background reads too busy.
The old way of handling a note like that meant regenerating the whole shot and hoping the rest survived intact.
Seedance 2.5 supports region-level editing. I change one part of a generated clip while the original motion, camera, and lighting stay fixed. When the note comes back asking for a different jacket colour, I edit that region. The camera move I worked out in Blender does not budge. The lighting holds. Only the jacket changes.
For 3D iteration this saves the most hours, because most of my revisions were never about geometry in the first place. They were small surface swaps that used to force a full redo.
Here is how a single revision used to go against how it goes now:
| Stage | Old previs-to-final pipeline | Seedance 2.5 white-model input |
| Build blockout | Blender grey scene | Blender grey scene |
| See it textured | Days of look-dev and rendering | One generation pass |
| Colour or material change | Re-render the affected shots | Region-level edit, rest untouched |
| Camera adjustment | Re-light and re-render | Re-block in Blender, regenerate |
The left column is where most of last year went. The right column is this year.
What trips people up
A workflow this different has a few snags worth naming, since I hit all of them early.
The first is treating the blockout as throwaway. Old habits say block it fast and rough because you will rebuild anyway. Now the blockout is the input, so ten extra minutes on clean geometry pays back in a cleaner render.
The second is over-trusting the style prompt and starving the reference stack. A single line of text describing the look gives the model far less to work with than two solid reference images. When my early results felt generic, thin references were almost always why.
The third is fighting the model on things the blockout should own. Camera and composition belong in Blender. If I try to rescue a weak camera angle with a text prompt after the fact, I am working against my own pipeline. Fix it in the blockout and regenerate.
None of these are dealbreakers. They are the adjustment cost of moving the white model from the trash pile to the centre of the shot.
Where this fits in a real pipeline
The teams getting the most from white-model input are not all chasing the same output.
Film and TV previs crews use it to test camera blocking and longer takes before a single frame reaches a render farm. The blockout was always their working language. Now it previews close to final, so a director can react to something that looks like the shot instead of grey boxes.
Game cinematic artists block a scene the way they would stage it in-engine, then generate a stylised version for pitch decks and concept tests without building final assets first.
Architecture and product visualisation sit comfortably here too. A white model of a building or a device is exactly the clean geometry the model reads well. A walkthrough that used to need a full lighting setup can begin life as a blockout and arrive as a clip.
The common thread under all of these is grey geometry as the starting point. That has been true for a long time. What is new is that the grey geometry now carries through to a watchable shot instead of getting discarded along the way.
How duration ties it together
I said earlier I would come back to length, and this is where it pays off for 3D specifically.
Seedance 2.5 generates a single continuous clip up to 30 seconds in one native pass, without stitching shorter segments together. For a shot driven by a white model, that means a full camera move has room to breathe. A 30-second walkthrough or a product reveal with a setup and a payoff can come out of one generation, with geometry and lighting holding from the first frame to the last.
Here is why that sits next to white-model input so neatly. A blockout’s whole value is spatial continuity. If the model could only hold that continuity for a few seconds, the previs advantage would fall apart on anything longer than a quick beat. Thirty seconds covers most of the shots I actually block.
I am keeping this short, because the duration story is big enough for its own piece, and the production side of it reaches well past 3D.
Getting access through Topview
I run all of this through Topview, which is where I have been generating since the model landed there.
A few practical notes if you want to try the same workflow. Seedance 2.5 is available across every tool on Topview, so the model and its features are not walled off in some separate product. Whatever tool you already use on the platform, white-model input and region-level editing are there with it.
On pricing, here is the part that made the math work for me. Topview is currently running 30 days of unlimited Seedance 2.5 generation. For previs that matters more than it might for other work, because previs is iteration by nature. The entire point of blocking a shot is to try it several ways, and a month of unlimited generation takes the counter-watching anxiety out of doing exactly that.
There is also an 80% off promotion running right now, which is what moved me from poking at the workflow to building my pipeline on top of it.
If you already work in Blender, the on-ramp is short, because you are not learning a new way to build. You block a shot the way you always have, then hand it to a model that finishes the thought. The skill you already own is the input, and the grey scene you used to throw away is now the first frame of the final.
Final Thought
For most of my career the blockout was a cost. I built it and judged it. Then I threw it out and started the real work. The render was the asset, and the grey scene was scaffolding I paid for and discarded.
Seedance 2.5 flipped which one I protect.
The blockout is the asset now. Everything I covered above exists to make that grey scene worth feeding to a model: the clean geometry, the camera I set in Blender, the references that hold a face steady, the honest scale of a figure against a door. The render comes downstream of the block.
For anyone already working in Blender, that is the entire pitch. You are not learning a new craft. You are aiming the one you have at a new endpoint.
The shift I keep noticing is quieter than a faster render. The decisions that shape a shot, where the camera sits and how the scene is staged, now happen at the cheapest possible moment, while everything is still grey and still easy to move. The expensive part of the shot moved to the front, where a mistake costs minutes instead of days.


Leave a Reply