

How to Make Short Product Videos for a WooCommerce Store With Templates
It’s Sunday evening, and Lena is getting her WooCommerce tea shop ready for Monday’s launch. The new blend, Autumn Spice, has its photos done, and she has a phone clip of the leaves opening up in a glass pot. She wants a 12-second vertical video for Reels and a version for the product gallery. Then she looks at the rest of the catalog: 40 other teas, none with video.
One clip she can finish tonight. Building 40 more the same way, each from scratch, is where her weekends would go.
The fix is to stop treating each product as its own project. Short product videos for a small store work best when every one follows the same structure and only the footage and text change. And once a video is on the product page, it has to stay light enough that the page doesn’t slow down.
Decide What the Video Has to Show
A product photo already does a lot. Video earns its place when it shows what a still image can’t, like size, texture and how the product gets used.
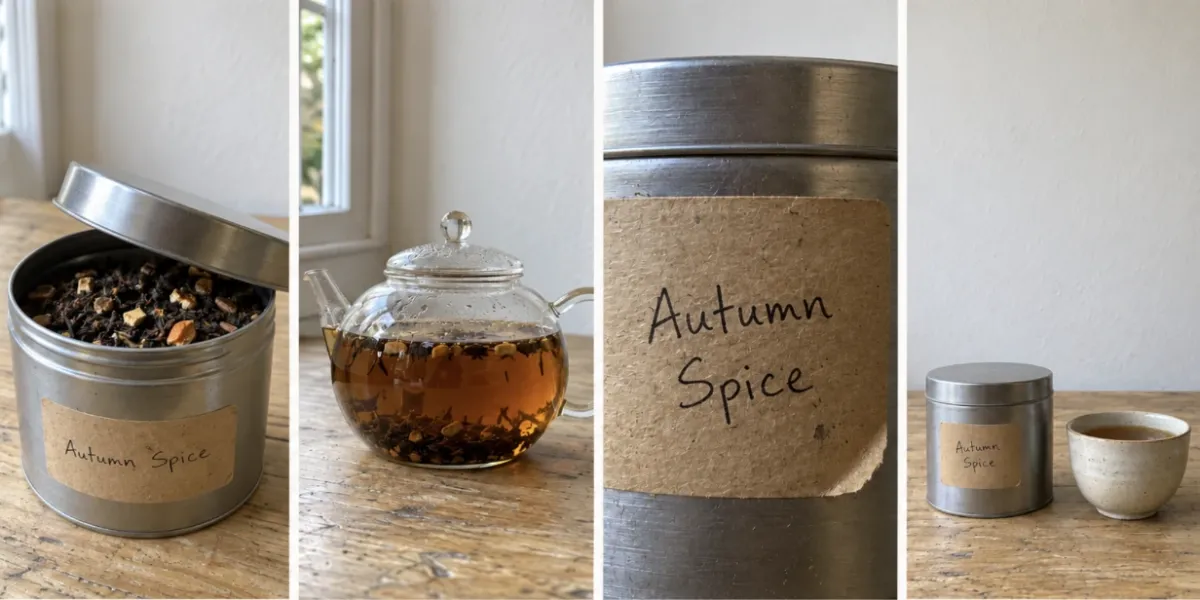
For Lena, that’s the tea opening up in hot water and the hand-written label on the tin. Every blend comes in the same tin, so the label is the only thing that tells one product from another. It has to be readable in every video.
It also helps to separate two jobs early. A short muted loop in the product gallery and a vertical clip for social media do different work, but they can come from the same footage. Plan for both now and you only shoot once.
Lock In the Structure Before You Edit
Give every video the same four beats. The first three seconds hook the viewer, seconds three to eight show one benefit or piece of proof, seconds eight to twelve add context, and the final moment carries a single call to action.
Keep each frame to one piece of information. If a product needs more explaining, give the context beat a little more room. Don’t squeeze a second and third selling point into it.
Rather than building that timeline from a blank screen, start from short product video templates and look at the promo and product-showcase layouts. Your job then shrinks to swapping in footage and text. Before committing to one, drop a single product’s clips into it and check whether the timing still holds with your own footage.
Autumn Spice maps onto the beats neatly: the tin opening, the tea brewing, a close-up of the label, and a final card that says “New this week.”
Prepare Footage Product by Product
A template only saves time if the footage going into it is consistent. Shoot every product from the same angle in the same light, with one main shot and one clip of it in use. For Lena, that’s the closed tin on her counter and the brewing shot, repeated for each blend.
Keep prices, discounts and label text out of the footage. Add them as editable text layers, so a price change is a one-line edit.
Name files by SKU. When you’re on product 23 and two pots of tea look identical, TEA-023-brew.mp4 is what stops the wrong clip from landing in the wrong video.
Make a Version for Each Place It Will Play
One export won’t fit everywhere. Vertical 9:16 is the safe default for TikTok, Instagram Reels and YouTube Shorts. On the product page or a landing page, a square 1:1 or horizontal 16:9 version usually sits better in the layout.
Keep text inside the safe area, away from the edges where platform buttons and captions sit, and preview each version on your phone before exporting. A label that reads fine on a laptop can vanish behind a like button.
Captions matter here too, since plenty of shoppers scroll with the sound off. NemoVideo is one option that pairs templates with automatic captions (Smart Caption), so you aren’t timing subtitles line by line for every product. Its Free plan includes 100 credits for trying the workflow. Watermark-free exports and the full template library sit on paid plans, so check that before you plan to publish anything made on a free account.
Keep Video From Slowing Down the Product Page
A product page has to load quickly, and a heavy video file is an easy way to slow one down. Export MP4 and compress it; a short gallery loop doesn’t need the file size of a film trailer. If you’re unsure which format suits which job, this guide to choosing the right file format walks through the tradeoffs between quality, size and compatibility.
Give every video a poster image, so shoppers see a clean frame instead of a black box while it loads. Don’t autoplay video with sound. If a short loop should play on its own, mute it and set it to loop.
For a click-to-play video, a few attributes do most of the work:
preload=”none” stops the browser from downloading video data before anyone presses play. For videos further down the page, web.dev’s guide to lazy loading video explains how to hold off loading until the video nears the viewport, autoplaying loops included. The guide makes one exception: if the video is the largest element on the first screen, don’t lazy-load it.
Lena puts the square Autumn Spice video in the second slot of the product gallery, right after the main photo. How you add video to a gallery depends on your theme or gallery plugin, so check its documentation before you export a whole batch.
Roll the Template Out to the Rest of Your Catalog
Once one version works, duplicate it and change only the footage and text layers. Leave the timing, transitions and caption style alone. Keeping those fixed is what makes 40 videos manageable.
Don’t try to cover the whole catalog in one weekend. Start with your five best sellers, see which videos get played, and work down the list from there.
By Monday morning, the vertical Autumn Spice clip is up on Reels and the square version is live on the product page. The other 39 teas are in next week’s plan, each waiting for a brew shot and a label close-up. If you want to start tonight, pick your best-selling product and build one 12-second version around the four beats.


Leave a Reply