
Healthcare Fitouts: A Practical Guide to Designing Better Clinics
A GP group I worked with opened a second site and got almost everything wrong. Consult rooms were too cramped for an exam couch and a wheelchair. Acoustics leaked private conversations into the corridor.
The website didn’t help. It listed the old address for three weeks, so patients bounced online and in person.
The refit fixed the rooms, ventilation, and wayfinding. A rebuilt website matched every physical improvement with accessible bookings and real-time wait information.
That’s what happens when you treat the fitout and the healthcare website design as one system. Get the room sizes, airflow, access, and digital touchpoints right, then measure whether care feels faster and safer.
Key Takeaways
Use this checklist to brief your team and prevent expensive compliance rework late in the build.
- Design for compliance first. Map NCC, Premises Standards, RACGP, NHMRC, and AS 1428.1/1668/5369 requirements room by room.
- Engineer patient flow. Plan 12–16 m² consult rooms, size waiting at about 1.2 m² per seated person, and separate clean and dirty routes.
- Build access in physical and digital spaces. Plan 850 mm clear door openings and 1.2 m corridors, then mirror it with WCAG 2.2 AA.
- Use ventilation as risk control. Target 6–8 ACH (air changes per hour) in general areas and about 12 ACH for aerosol-generating rooms.
- Make digital reduce admin load. Online bookings, reminders, and secure messaging cut calls and reduce avoidable no-shows.
What a Healthcare Fitout Covers
A healthcare fitout is a regulated clinical build, not an interior refresh.
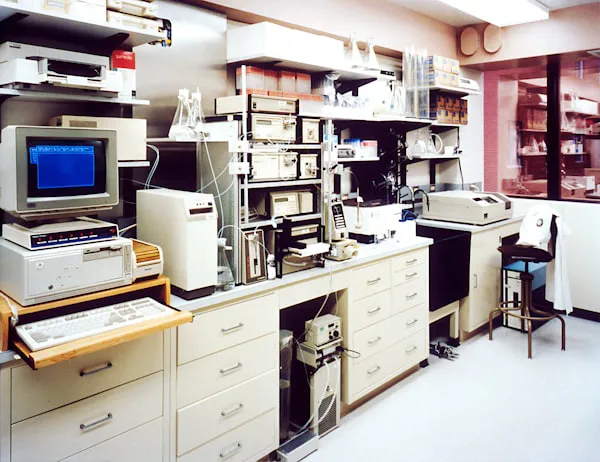
It includes spatial layout, mechanical and electrical services, infection-control finishes, HVAC (heating, ventilation, and air-conditioning), ICT, and commissioning. Commissioning means testing, adjusting, and documenting that systems perform to specification before opening. For Australian clinics looking for a turnkey partner that coordinates design, compliance, and delivery, Soulmed’s healthcare fitouts cover the full scope from initial brief through to handover.
In Australia, the compliance stack starts with the NCC (National Construction Code). If you deliver procedures involving sedation or supervised post-treatment recovery, you may trigger Class 9a requirements, which tighten fire safety, egress, and services rules. Confirm classification with your building certifier before design starts.
Design for Evidence-Led Outcomes
Good fitouts reduce friction in three places: patient flow, infection control, and access and privacy.

1. Improve Flow and Throughput
RACGP layout guidance points to consult rooms of about 12–16 m². That footprint typically fits an exam couch, privacy screen, hand basin, clinician work zone, and two patient seats.
Waiting areas also need arithmetic, not vibes. Australasian Health Facility Guidelines are commonly used for allowances of about 1.2 m² per seated person, plus space for mobility aids and prams. Model peak arrival bursts, then add capacity where queues form, not where it looks nice.
2. Reduce Infection Risk and Rework
Ventilation targets should follow clinical risk. RACGP guidance commonly references about 6–8 ACH for general areas and about 12 ACH for rooms where aerosol-generating procedures occur.
For instrument reprocessing, AS 5369:2023 supersedes older AS/NZS 4187 and 4815 standards. The Australian Commission on Safety and Quality in Health Care requires services to complete an AS 5369 gap analysis by 30 June 2025 and commence implementation. Design for one-way, clean-to-dirty movement now, so you don’t rebuild later.
3. Earn Trust Through Access and Privacy
The Disability (Access to Premises – Buildings) Standards 2010 set minimum access requirements for public buildings. From July 2025, amended Premises Standards reference AS 1428.1:2021, covering accessible paths, ramps, door clear openings, controls, signage, and sanitary facilities.
On-site details need a digital twin. WCAG 2.2 (Web Content Accessibility Guidelines) is the global accessibility standard, and WCAG 2.2 AA is the practical target most clinics can meet. If a patient can’t find step-free access, parking, or interpreter options online, you’ve created a barrier before they arrive.
Design the Clinic to Work in Practice
Design around real workflows, then document how each room meets the relevant standard.
Break the plan into zones: entry and wayfinding, consult and treatment, reception and waiting, staff and storage, clean and dirty workflows, and plant and comms. Create a compliance matrix that links each room to the NCC, Premises Standards, RACGP Standards, NHMRC infection-control guidance, and the relevant Australian Standards.
Specify details that stop day-two problems. Consult rooms need protected power and data at clinician and diagnostic positions, safe sharps placement, and cleanable joinery. Waiting needs slip-resistant floors, wipeable seating, acoustic treatment, high-contrast signage, and allocated wheelchair bays.
Engage and Commission Early
The fastest projects aren’t rushed, they’re decided early with the right people in the room.
Run co-design workshops with clinicians, reception, and patients, including people with disability. You’ll catch pinch points like wheelchair turning circles, pram parking, reception sightlines, and sound transfer before you lock in walls and services.
Evaluate vendors on health-sector evidence. Your RFP should ask for comparable references, a sample commissioning plan, a defects process, and a warranty matrix for finishes, HVAC, and critical equipment. If a supplier can’t explain how they validate airflow, pressure relationships, and filtration, keep looking.
Pair the physical build with healthcare website design from day one. Aim for WCAG 2.2 AA and performance that meets Core Web Vitals, Google’s user-experience metrics: LCP (Largest Contentful Paint) under 2.5 seconds, INP (Interaction to Next Paint) under 200 milliseconds, and CLS (Cumulative Layout Shift) under 0.1. INP replaced First Input Delay in March 2024, so test for responsiveness, not just initial input.
Track Fitout and Website Performance
If you don’t measure the before-and-after, you’ll argue opinions instead of fixing constraints.
On-site, track average wait time, door-to-doctor time, consults per clinician per day, and room utilisation. Set a baseline before the fitout, then review monthly for the first six months while the team settles into new workflows.
Digitally, track booking conversion rate, call deflection (how many queries move from phone to self-service), and form drop-off. Use Search Console field data for Core Web Vitals, not only lab tests. Add SMS and email reminders with one-tap reschedule links, NSW Government trials using behaviourally informed SMS reminders reduced outpatient no-shows by about 34 percent.
Schedule ongoing checks: annual reprocessing audits against AS 5369, HVAC ACH re-verification, acoustic spot checks, and an access consultant review after any change to rooms or routes.
Align the Building and the Browser
Patients experience your clinic as one journey, so your signage, staff scripts, and website should tell the same truth.
Create a single source of truth for access and arrival information, including parking, lifts, step-free routes, and who to call for assistance. Use it in on-site signage, appointment confirmations, and a website FAQ. Publish service-specific preparation steps and expected visit length, then collect post-visit feedback on acoustics, access, and waits to guide the next improvement.
If you’re comparing turnkey partners, ask who will coordinate design documentation, certifiers, approvals, and commissioning evidence, and who can keep the build moving without forcing your clinicians to chase decisions.
Leave a Reply