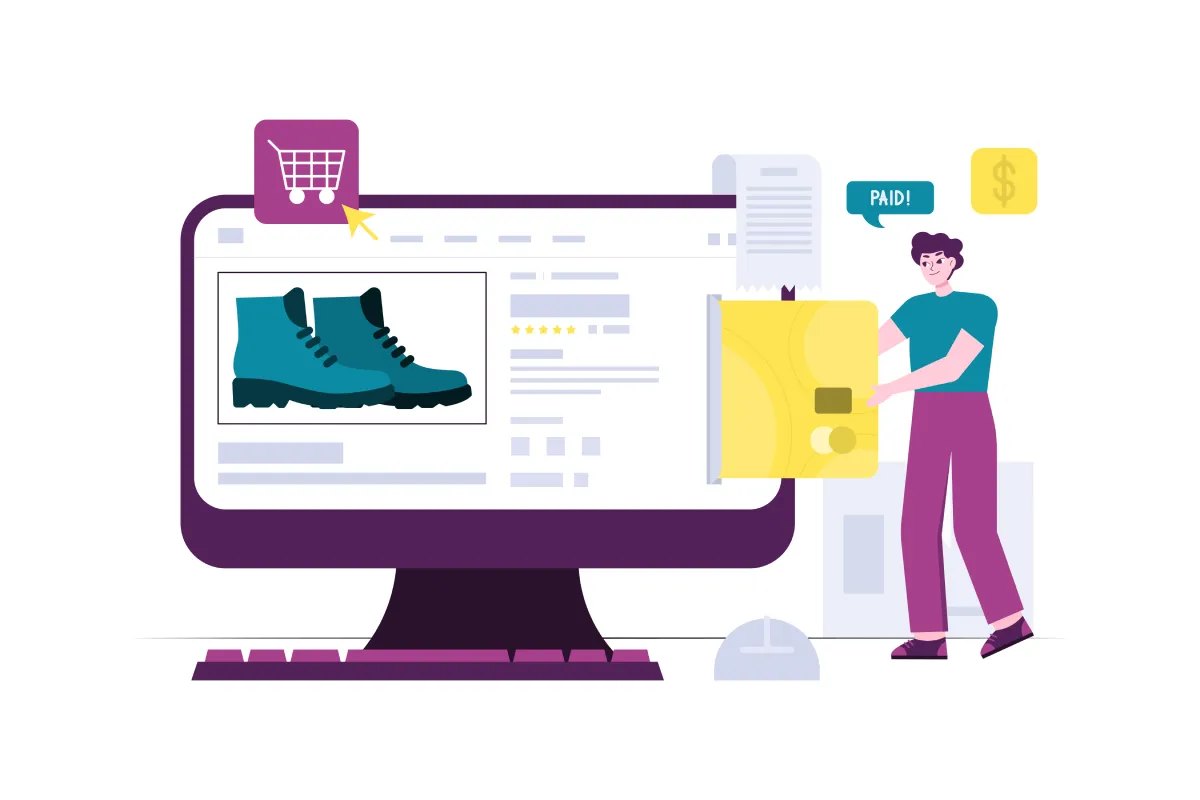
Setup Shipping Rates on Shopify – The Complete Guide [2025]
One of the most important things you’ll do as an eCommerce entrepreneur is to set up your shipping rates on Shopify. The way you charge for shipping can be the distinguishing factor of your customer’s shopping experience and the business’s profit or loss regardless if you are a small boutique or an online store owner.
This complete step-by-step guide will take you on the journey of configuring Shopify to set shipping rates from the fundamentals to the most advanced methods. You will be able to choose from several different shipping rate setups from custom shipping rates Shopify to free shipping,use multi-apps for more operational scope and speed, and lastly improve the checkout process thus raising customer loyalty as well as the number of orders. Let’s go!
How Shipping Rates Works on Shopify
Shopify shipping rates are the fees that a customer’s order will be subjected to besides the cost of the products. When the customers come to the checkout page, the most current available shipping options are presented to them. These shipping options are those that have been specified by you in your Shopify settings. The options that could be available are flat ratings, weight-based shipping, or price-based ratings that are affected by the shipping directives zoning that you’ve applied.
To put it in simple words, shipping rates on Shopify can be:
- Flat fees to be based on shipping (fixed amount regardless of cart size)
- Price-based weighing cost (submit as per cart sum or item weight)
- Live calculated shipping rates (real-time rates based on carriers)
Apart from basic rates, Shopify enables you to configure shipping discounts, offer free shipping, and include shipping optimizations such as pick-up at the store and local delivery as well for your customers’ personalized experience.
Importance of Proper Shipping Rate Setup
The way you manage the Shopify shipping rates can significantly influence your store’s success. Here is the reason why it matters to execute the setup of shipping rates on Shopify correctly:
- Customer Satisfaction: Customers expect transparency and fairness in the shipping process. Misleading or inconsistent shipping costs can cause the abandonment of a cart. An effective shipping system is when the clients are having a successful checkout process.
- Competitive Advantage: The flexibility in shipping as a further addition to the standard services provided, such as free delivery for orders whose total value is over a particular sum or faster delivery of goods for a premium, can make your store stand out from others.
- Cost Control: Proper pricing helps your business not only to have enough money but also makes customers happy. Too low rates will force your company to cover transport expenses that eat into your margins. On top of shipping expenses, your Shopify subscription itself is a recurring cost worth optimizing. Using a Shopify promo code when signing up or upgrading your plan can help reduce your overhead, leaving more budget to invest in competitive shipping options for your customers. On the other hand, overpricing may be a reason for hesitation by buyers, so they end up leaving or not proceeding.
- Scalability: The more your business grows, the more you will need to evolve your shipping strategy to accommodate larger order volumes and possibly international demand. Shopify’s shipping system is elastic, and this factor makes it a piece of cake to modify and reconfigure, when your business grows.
Types of Shipping Rates on Shopify
The path to picking the method that best serves your business lies in your familiarity with the Shopify shipping rates. These are:

- Flat Shipping Rates
Flat shipping rates are the simplest and the easiest types to introduce. These represent uniform charges that are developed independent of order weight or size, all due to the order quantity customers have.
- Example: In addition, you may require $5 USD for standard shipping, and $15 USD for expedited shipping.
Furthermore, the costs are the same regardless of the type of purchase by the customer.
Flat shipping rates are useful when:
- You prefer a simple and transparent system.
- You’re shipping similarly sized and weighted items.
- You would like shipping to become something predictable for your customers.
- Price-Based Shipping Rates
Price-based shipping rates mean you are able to specify shipping costs according to the total price of the order and thus provide a more flexible service to your customers.
Example:
- Orders under $50 USD: $4 shipping fee
- Orders over $50 USD: $10 shipping fee
- Orders over $100 USD: Free shipping
This solution is most effective in circumstances when your product combines wide spectrum price categories with significant weight variances. Yet you do not want to confuse customers with complex shipping options; instead, offer them simple tiered incentives based on the order’s total.
- Weight-Based Shipping Rates
Weight-based rates apply when the total weight of the order determines the shipping cost. For example, an order with a heavier package will cost more to ship.
Example:
- Orders weighing 0 – 1 lb: $4.99 shipping fee
- Orders weighing 1 – 5 lbs: $9.99 shipping fee
- Orders weighing over 5 lbs: $19.99 shipping fee
This solution will be good for the retailers who deal in such items of different weights, for example, clothing, electronics, or books.
- Free Shipping Rates
Offering free shipping is a similarly attractive incentive for shoppers. You can have free shipping set as the default under certain conditions such as a minimum order value or a special promotion.
Example: Free delivery on orders over $100.
- Free shipping is useful for the following:
- Encouraging customers to choose higher value orders.
- In the general course of business, businesses may create promotions as a tool to drive sales.
- For the fact customers can be more likely to finish a transaction if they feel no shipping costs are involved and hence, cart abandonment will be less.
- Calculated Shipping Rates
Calculated shipping rates are real-time rates provided by your chosen shipping carriers (like UPS, FedEx, or DHL). These rates are no longer overweight or dimensions along with shipping origin, destination, and delivery time just the facts that matter.
Calculated shipping rates are beneficial when:
- It is necessary for you to transmit the operative shipping expense to the customer.
- Finding an effective flat rate that works for such large, potentially high-weight items or those that ship overseas.
- You provide customers with the possibility of fast shipments (e.g., standard vs. expedited shipping).
How to Setup Shipping Rates on Shopify

Shipping rates on Shopify are easy both for new merchants and for those who want to make advanced tweaks.
Setup from Scratch Using Shopify Admin
This section will walk you through the steps for configuring shipping zones, flat rates, carrier-calculated rates, transit times, backup rates, and troubleshooting issues with shipping rates.
1. Setting Up Shipping Zones
Shipping zones, areas, or countries you ship to, determine how the shipping charges are applied, and therefore they should be specified.
Steps:
- Go to Settings > Shipping and Delivery.
- Create or Edit a Shipping Profile: Click on Create New Profile or select an existing one.
- Add a Shipping Zone: Click Create Shipping Zone and select the countries or regions for this zone.
- Assign Shipping Rates: You can add flat rates, weight-based rates, or carrier-calculated rates to the zone.
2. Setting Up Flat Shipping Rates
Flat shipping rates are the fixed amounts that you will charge the customer. This remains the same regardless of the size or weight of the package or the number of items ordered.
Steps:
- Create or edit a Shipping Profile.
- Select a Shipping Zone: Choose the region you want flat rates to be included.
- Add a Rate: To do that, simply click the Add Rate button, choose Flat Rate, and decide on the conditions based on the price or weight of the order (e.g., $5 for $50 orders or less).
- Optional: Add a handling fee if desired.
3. Setting Up Carrier-Calculated Shipping Rates
Carrier-calculated rates, which are estimated shipping costs based on the package size, weight, and address of delivery, are real-time shipping costs.
Steps:
- Go to Settings > Shipping and Delivery.
- Connect a Carrier Account: Click Connect Carrier Account, and choose a carrier like USPS, FedEx, or UPS.
- Add Carrier Rates to a Shipping Zone: Select Use Carrier or App to Calculate Rates and choose the carrier.
- Shipping service selection: Determine which services (USPS Express Mail, UPS Ground, etc.) should be offered.
- Optional: Add a surcharge on shipping costs if necessary.
4. Activating Third-Party Carrier-Calculated Shipping
Using third-party carriers for shipping is possible via Shopify’s Drive or Shopify go above plan only if you intend to receive real-time shipping charges by USPS or FedEx. Of course, you can add it to the other plans also, but you have to pay a monthly fee.
Steps:
- Ensure Your Store Meets Requirements: You have to be in Advanced Shopify or Shopify Plus or decide on this option for a specific fee of payment.
- Connect a Third-Party Carrier Account: Go Settings > Shipping and Delivery, choose the Manage Carriers button, and click Connect Account.
- Test the Integration: Make sure the rates are being added to Shopify’s dashboard correctly.
- Add Rates to Shipping Zones: After the carrier has been connected, attach the calculated rates that you’ll be able to use to your shipping profiles.
5. Setting Up Transit Time for Flat Shipping Rates
Transit time refers to the period of time it will take the order to get to the customer’s address. This delivery time will let the customers decide the most suitable shipping method for them.
Steps:
- Choose Settings > Shipping and Delivery.
- Change the shipping rate: Choose the one for which you want to allocate the transit time, then use the Edit Rate button.
- In this section, you can choose a preset transit time or add one manually.
- Save: Hit Done, and then Save.
6. Setting Up Backup Shipping Rates
Backup shipping rates are shown as an alternative when the third-party carrier is unavailable, hence it will not become an obstacle for customers to buy the products they ordered.
Steps:
- Navigate to Settings > Shipping and Delivery Options.
- Edit the Shipping Zone: Choose Carrier and app rates by clicking Edit Rate.
- Pick Backup Rates: Whether you prefer to operate with Shopify’s default backup rates or go for the customized ones based on order value or weight of items, you have the choice.
- Keep: Click on the Done button and then the Save button to finalize the settings.
7. Troubleshooting and Testing Shipping Rates
If shipping rates aren’t showing up correctly, you can follow these steps to fix the problem:
Common Issues:
- Product Settings: Double-check that all physical products are indeed marked as “Physical” and have the correct weights specified.
- Shipping Profiles: Check that all products are in the correct shipping profiles and zones.
- Carrier-Calculated Rates: Make sure that the package size and weight are correct.
- Address Validation: Re-check the customer’s address to avoid issues if it’s not valid.
- Backup Rates: Ensure that there are fallback rates in place in case the carrier-calculated rates are not achievable.
Steps to Test:
- Create a Sample Order: Capturing the process of checkout, view if the rates show or not.
- Verify Shipping Profile and Zone Settings: Check again whether all zones and rates have been added to the shipping profiles.
- Check Package Dimensions: Verify that the preset package and the size of the product both meet the carrier’s requirements.
Advanced Shipping Rates Setup Using Shopify Apps

For more flexibility, the sellers can use Shopify apps that provide more options for configuring the shipping rates. apps offer great customization and features which are not provided by Shopify by default.
We recommend Shipzip – Shipping & Delivery app for custom shipping rates & local delivery management. This app is capable of any kind of custom shipping rates creation. Also manage local delivery, store pickup & delivery date picker. Shipzip has a 5/5 rating on Shopify app store & support is next level.
- Custom Shipping rules (for example, exclude specific products or customers)
- Real-time carrier-calculated rates which come in handy precisely at the time of shipping.
- Promotions and discounts (e.g., free shipping of select products)
- Tracking and management of orders throughout the different carriers
- Multi location shipping rates management
- Charge extra shipping rates on weekend days
- Shipping rates by zip code, order value, products, distance & more
Leveraging Shopify Markets and Shopify Markets Pro
Shopify Markets helps you expand your sales globally by adjusting the shipping rates for foreign customers. Shipping can be customized according to the countries or regions, and hence, competitive pricing is ensured in different markets.
What is Shopify Markets?
Shopify International, previously called Shopify Markets, is a versatile solution built to streamline overseas sales. It allows you to deal with shipping, taxes, customs, and pricing based on the location we are handling, all in a single store. However, Shopify International makes it possible for you to provide customized shipping rates for various countries or regions. Thus enabling you to do international business, the only thing you need to do is not have separate stores for each market.
What is Shopify Markets Pro?
On June 24th, the tool that was previously referred to as Shopify Markets Pro, was rebranded and now it’s called Managed Markets. This comprehensive feature is a powerful option for businesses that sell internationally and want to work with a merchant of record to handle the legal and financial complexity of offshore markets.
Managed Markets also manages duty and tax calculations, shipping fees, and provides secure, localized payment options for customers around the globe. It makes sure that customers get a clear check out screen where they can see the price which includes all the taxes, duties, and shipping of the products. Therefore, the customers will experience a smooth and transparent transaction process.
Key Features of Shopify Managed Markets:
- When it comes to Tax & Duty Artificially Calculations it does this by allowing duty and tax calculation in automation based on our clientele’s region. Ensures us that we comply with the required dealing.
- It is a feature that provides the relevant and cheaper shipping methods that have been adapted to the region.
- Plays the role of allowing the use of local currencies and payment methods, thus it’s convenient for one to get their money out of the grave during checkout.
- It is a Merchant of Record Model. Shopify will be in charge of the whole legal and financial bargaining involved in global transactions, thus making the transactions easier for the merchants who operate worldwide.
- It is Shopify’s most comprehensive international sales package, which introduces you to the world as a local while Shopify deals with this production.
Managing International Markets:
Your Plan Limit to International Markets:
- Pause and Build, Shopify Starter, Basic Shopify, Shopify: Limited to only 3 markets
- Advanced Shopify: 3 markets are included with a maximum of 50 markets
- Shopify Plus: Up to 50 market
Manage Local Delivery & Store Pickup on Shopify
Local delivery and store pickup options are among the many handy ways that you can bring about better customer satisfaction thereby lowering your shipping expenses
Local Delivery:

You can go ahead with local delivery by either creating a delivery radius or postal code range. Set your orders to be fulfilled only for purchases reaching a specific amount and you can also charge a delivery fee. This is ideal practice for physical stores and retailers that serve the local customers.
Here’s how to set up local delivery for your Shopify store.
Eligibility Requirements
Local delivery can be used for the store if the store meets certain conditions:
- Shopify Plus: You need not have more than 20 locations and the self-managed checkout should be disabled.
- Other Shopify Plans: While local delivery is typically permitted, there might be some limitations. Better get in touch with Shopify Support if you are uncertain.
Checkout Experience
After local delivery is turned on, customers who qualify for this option will see it as one of the possibilities at the checkout page. Local delivery is possible in the following cases:
- If all items in the cart are eligible for delivery from one location.
- According to the customer’s delivery address, the car will travel within the specified area (radius or postal code).
- The customer pays through Shop Pay; local delivery is not supported by other fast checkout options (Apple Pay, Google Pay, and PayPal).
Before Setting Up Local Delivery
Ensure the following before enabling local delivery:
- Add Delivery Locations: Pick up and note the specific places from where deliveries will be carried out.
- Stock Inventory: All locations must be sure that they are having the required items for delivery.
- Admin Access: Those who perform supply chain management must be Shopify admin-accessible.
Setting Up Local Delivery
- Go to Settings > Shipping and Delivery.
- Enable Local Delivery for each location.
- Choose Delivery Method: Either a circle delivery (up to 100 miles/160 km) or the postal codes you want to.
- Set Delivery Price: Alternatively, allocate the minimum order amount and delivery price. You can offer free delivery by means of putting the price at zero.
Conditional Pricing
You have the option to create a conditional pricing system whereby the order amount is the determinant.
Example: Delivery charges of $5 for orders over $5, $3 for orders over $10, and free on orders over $20.
- Go to Settings > Shipping and Delivery.
- Click Manage, which is next to the location, then select Add Conditional Pricing.
- Set your rules and save.
Delivery Zones
You can configure several delivery zones using either distance radius or postal codes. Furthermore, different delivery prices can be set for each zone as needed.
- Navigate to Settings > Shipping and Delivery.
- Click Manage near to the location then click on ‘Create Delivery Zone’.
- Designate the zone with already provided radius or postal codes, establish the price, and save the data.
Fulfilling Local Delivery Orders
Local delivery set-up is completed, and now you have another option over the previous option to transfer orders in house or by using third-party delivery services. Remember to keep track of each order and thus make sure it is on time. Partnering with reliable courier services can help ensure fast, efficient deliveries that boost customer satisfaction and streamline your operations.
Order Confirmation and Notifications
Adding delivery instructions to the Order Confirmation email can be achieved by using the following Liquid variable:
“{% if delivery_instructions != blank %}
Delivery instructions: {{delivery_instructions}}
{% endif %}”
This would display any special delivery instructions the customer may have given.
Store Pickup:

Enable your customers to collect their orders from the store. This takes off their shipping expenses and provides you with the opportunity to interact with them directly which creates loyalty and enables you to give them a personalized experience.
To offer in-store pickup on Shopify, you need to meet certain prerequisites and ensure your store’s settings are configured properly.
Eligibility Requirements
- Location: You must have at least one location that fulfills online orders.
- Checkout Version:
- Shopify Plus users must activate checkout extensibility.
- Non-Plus stores must have the latest version of Shopify checkout, which most stores already have.
Considerations Before Setting Up Pickup
- Separate Orders: Customers cannot combine items for shipping and in-store pickup in a single order. Separate orders are required.
- Product Availability: If your theme supports pickup availability, customers can see if a product is available for pickup before adding it to the cart. This does not work with store transfers.
- B2B Checkout: Pickup in-store is not supported for B2B checkouts.
Setting Up In-Store Pickup
- Navigate to Settings: Go to Settings > Shipping and Delivery.
- Enable Pickup: In the Pickup in Store section, click Set up or the › icon.
- Select Location: Choose a location where you want to offer pickup. For multiple locations, click Add Location and select the store.
- Processing Time: Set an expected pickup date for orders (this shows to customers).
- Optional:
- Set up store transfers to allow inventory transfer from other locations if items are out of stock.
- Enter custom pickup instructions in the Ready for Pickup notification.
- Preview the pickup option at checkout.
Click Save.
Store Transfers Setup
Store transfers allow you to transfer inventory from one location to another when an item is out of stock at the pickup location.
- Go to Settings > Shipping and Delivery.
- In the Pickup in Store section, click the › icon.
- Choose Location: Select the location to enable transfers.
- Set Transfer Locations: Choose the locations to transfer stock from.
- Set Different Processing Time: If desired, set a different processing time for store transfers.
- Click Save.
Excluding Products from Store Transfers
You can exclude specific product collections from being available for store transfers, which is useful for large or difficult-to-transfer items.
- Create a collection for products that cannot be transferred.
- Go to Settings > Shipping and Delivery and select Pickup in Store.
- Under Transfer exclusions, click Add Collections.
- Select the collections to exclude from transfers and click Done.
Activating a Pickup Service (Shopify Plus Only)
Shopify Plus stores can use custom apps for in-store pickup management. To activate a custom app:
- Go to Settings > Shipping and Delivery.
- In the Pickup in Store section, click the › icon.
- In the Pickup Service section, click Change.
- Select the app to manage your in-store pickup and click Save.
Manually Transfer Items for Pickup Orders
If an order requires items to be manually transferred, follow these steps:
- Go to Orders in Shopify Admin.
- Open the order you want to modify.
- Click the button in the Unfulfilled section.
- Select Change Location.
- Choose a new location and click Change Location.
Fulfilling In-Store Pickup Orders
To fulfill an in-store pickup order:
- Go to Orders and click the pickup order.
- If a store transfer is required, click Transfer to Pickup Location.
- Click Prepare Pickup when ready.
- Send Pickup Notification to the customer.
- Once the customer picks up their order, mark it as Picked Up.
Checkout Experience for Customers
Once pickup is enabled, customers can choose between Ship or Pick Up at checkout. They can:
- Select a pickup location (if you have more than one).
- View the estimated pickup time.
- Only see available locations in their country.
If your theme supports it, customers can also check if a product is available for pickup before adding it to their cart.
Displaying Pickup Availability
Some Shopify themes allow customers to view pickup availability on the product page. This shows whether the item is available for pickup and includes an estimated pickup time.
- Single Location: Shows pickup availability for that location.
- Multiple Locations: Displays pickup options for all active locations.
- Customers can check availability at other locations by clicking Check Availability at Other Stores.
Turning Off In-Store Pickup
If you no longer want to offer in-store pickup, you can disable it:
- Go to Settings > Shipping and Delivery.
- In the Pickup in Store section, click the › icon.
- Select the location to disable and click Turn off Pickup in Store.
Do More with Shipping Rates on Shopify
Shopify offers enough flexibility to ensure that you get the perfect shipping rates that go with your business features. Here’s a way to add some dimensions to your shipping settings that make your customers happier, drive more conversions, and help you run more smoothly.
Hide, Rename & Reorder Shipping Rates by Different Rules

Now you can customize how shipping rates look on the checkout page by hiding or renaming the rates.
- Hide shipping rates if they match some specific conditions, e.g., if order value is higher than a determined threshold or the order needs to be delivered to a particular location.
- Rename” shipping rates” to make them even more detailed (e.g., by replacing “Standard Shipping” with “5-7 Day Delivery”).
- Reorder” shipping options that are more important so that the ones that are either the fastest or cheapest are seen first. (e.b Shopify by default showcases local delivery first and this causes a lot of issues. We can move it to last for international users)
This is a perfect option for businesses that have different customer groups or areas with various shipping requirements. For instance, such a business can remove the flat rate option from the list for customers who get free shipping as their order is over $100.
Shopify does not allow directly this feature in the admin so we need to use Shopify app for this. Apps like Shipfy is more used by stores. This app has custom features for hiding, renaming & reorder shipping rates by different rules.
Shipping Discounts by Product, Tag, Total, etc.
Offering shipping discounts based on total, product tags or customer groups is by far the best way to promote and sell more. For example, you can :
- Discounted shipping rates can be awarded to the customers who buy words of certain products or product categories.
- Customer’s whose order total is more than a predefined value will get free shipping.
- The reduced rates will be for customers who buy multiple items from one specific collection.
Shipping apps such as Shipoff will help you set up these advanced shipping discount features, which you can use to enforce automatic procedures of customer loyalty and hence conversion rate increasing, as well.
Conclusion
Shipping rates on Shopify is a rather crucial part of order fulfillment, and it ensures a good customer experience as well. Offering flat, calculated, and even advanced delivery options are some of the methods that you can employ to balance out the customer needs together with cost control.
You can personalize the order process based on the nature of your business, even if you are doing local delivery, whether it is in-store pickup or shipping to the international markets that you do with the Shopify Markets.
Flexibility in shipping strategy will make the store available both in the locality and overseas hence improving the organization’s performance besides customer satisfaction. Bring your shipping charges to launch your business now and your clients will be happier in the future.
Leave a Reply