Faq

Frequently Asked Questions

Porto 6.2.0 uses Bootstrap 5 instead of Bootstrap 4.  If you find some broken pages, you don't need to worry about that. Mainly two reasons might cause that kind of broken styles. You'd better read this article first.

1. Enhanced Grid System

  • .xxl Class - Bootstrap’s grid system can now adapt across all six default breakpoints. The six default grid class are as follow: xs, sm, md, lg, xl and xxl. The class .xxl will handle breakpoints that are beyond the regular bootstrap media query breakpoint which has a minimum dimension of 1400px grid breakpoint in a 12 column layout.
  • Gutter Classes - If you are planning on controlling the horizontal gutter widths, you need to use the .gx-* class. Alternatively, you can use the .gy-* class to control the vertical gutter widths.
  • Style Expression Modification - If you come across some broken styles in width determination process, check style expression first. In Bootstrap 5, you could use flex: 0 0 auto; width: xx%;, while flex: 0 0 xx%; max-width: xx%; is used in Bootstrap 4.

2. Helper Classes

  • float-left > float-start
  • float-right > float-end
  • text-left > text-start
  • text-right > text-end
  • rounded-left > rounded-start
  • rounded-right > rounded-end
  • border-left > border-start
  • border-right > border-end
  • dropdown-menu-left > dropdown-menu-start
  • dropdown-menu-right > dropdown-menu-end
  • ml-0 > ms-0
  • ml-1 > ms-1
  • ml-2 > ms-2
  • ml-3 > ms-3
  • ml-4 > ms-4
  • ml-5 > ms-5
  • ml-auto > ms-auto
  • mr-0 > me-0
  • mr-1 > me-1
  • mr-2 > me-2
  • mr-3 > me-3
  • mr-4 > me-4
  • mr-5 > me-5
  • mr-auto > me-auto
  • pl-0 > ps-0
  • pl-1 > ps-1
  • pl-2 > ps-2
  • pl-3 > ps-3
  • pl-4 > ps-4
  • pl-5 > ps-5
  • pr-0 > pr-0
  • pr-1 > pe-1
  • pr-2 > pe-2
  • pr-3 > pe-3
  • pr-4 > pe-4
  • pr-5 > pe-5

If you think this article is not enough, please go to How to Migrate from Bootstrap Version 4 to 5.

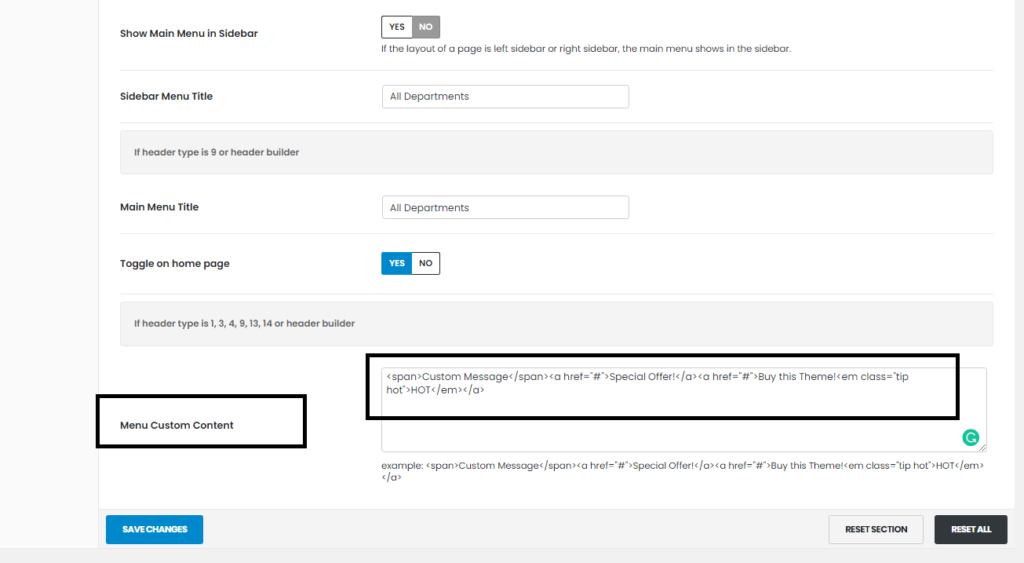
Please go to Porto > Theme Options > Menu. You should edit Menu Custom Content in If header type is 1, 4, 9, 13 or header builder.

You can show wpml language switcher or wpml currency switcher.

You should enable Show WPML Language Switcher and Show WPML Currency Switcher options in Theme Options > Header > View, Curremcy Switcher.

Before enabling these options, you should install WPML and WooCommerce Multilingual - run WooCommerce with WPML plugins.

You should configure wpml language switcher in WPML > Languages > Language switcher options. You can see here for more details.

You should configure wpml currency switcher in WPML > WooCommerce Multilingual > Manage Currencies. You can see here for more details.

- Please go to Theme Options > Woocommerce > Product Archives > Product Layout.. - Please select Show Quantity Input type.
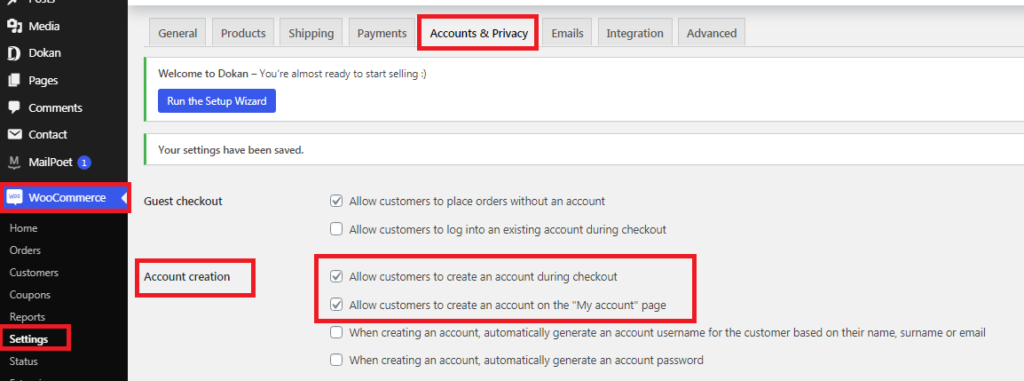
Please go Woocommerce > Settings on admin sidebar. Please go Accounts section. Please check Enable registration on the "My Account" page in Registration Options.
If update version is available, alert message will be displayed at the top of the admin panel. You can update plugins in Porto -> Setup Wizard -> Plugins panel. For more details please check guide.
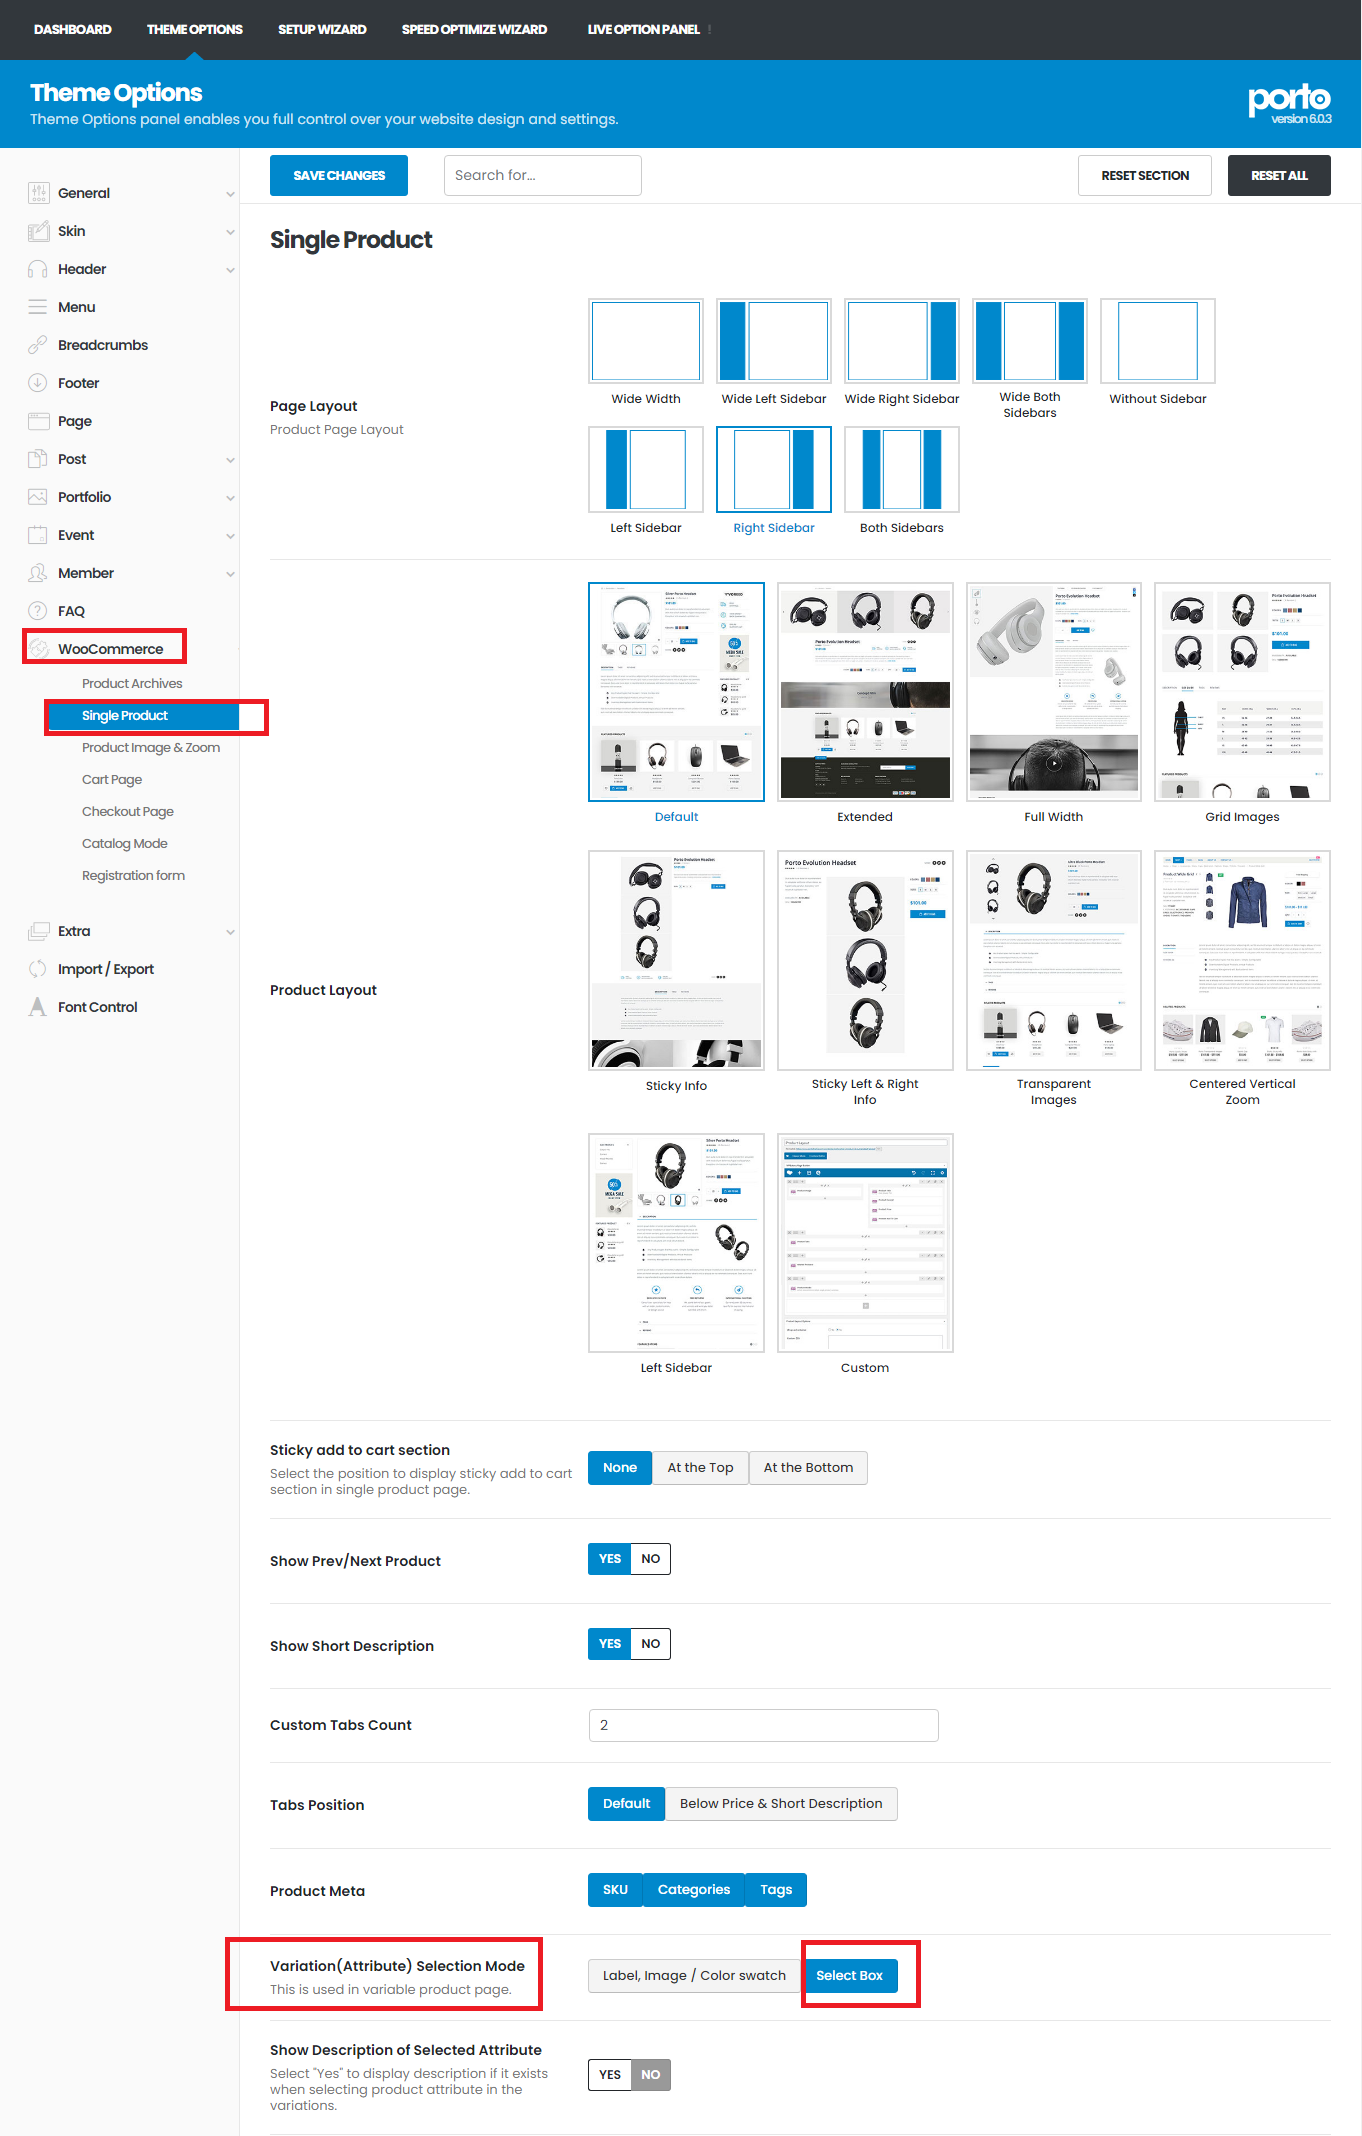
- Please go to Theme Options > Woocommerce > Single Product > Variation Selection Mode. - Please check Select Box.
Please delete all the menus in Appearance > Menus. Please import demo content again in Porto > Setup Wizard >  Demo Content.

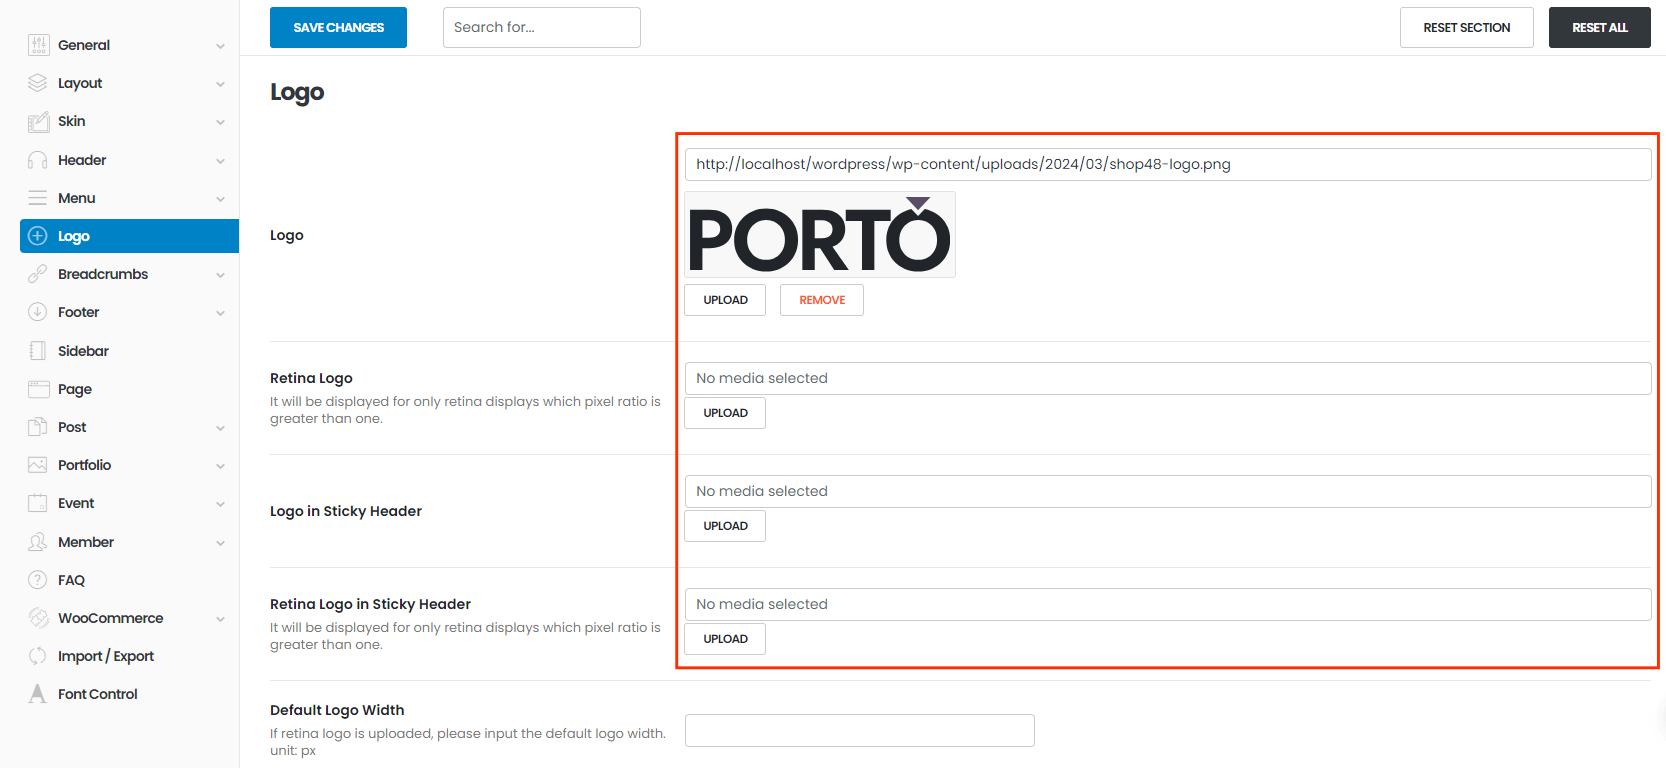
If you navigate to Porto > Theme Options > Logo on admin sidebar, you can find site logo related options there. Here, you can set logo of your site.

Logo change places
Logo

You can set site logo here.

Retina Logo

You can upload a high-quality logo here, ensuring a pixel ratio greater than 1 for optimal display.

Logo In Sticky Header

You can upload sticky header's  logo here.

Retina Logo in Sticky Header

You can upload a high-quality logo for the sticky header here, ensuring that the pixel ratio is greater than 1 for optimal display.

After uploading the logo, please set its width and height accordingly.
you should set the width and height of it.